• Home
  • Recipes
    • Vegan
    • Vegetarians
    • Meat Lovers
    • Seafood
    • Desserts & Sweets
    • Breakfast & Brunch
    • Dinner
    • Quick & Easy
  • Drinks
    • Cocktails & Spirits
    • Coffee, Tea & Hot Beverages
    • Non-Alcoholic & Mocktails
    • Smoothies & Shakes
  • Lifestyle
    • Editor’s Pick
    • Kitchen Gadgets
Healthful Plate
keep your memories alive
Desserts & SweetsQuick & EasyRecipes

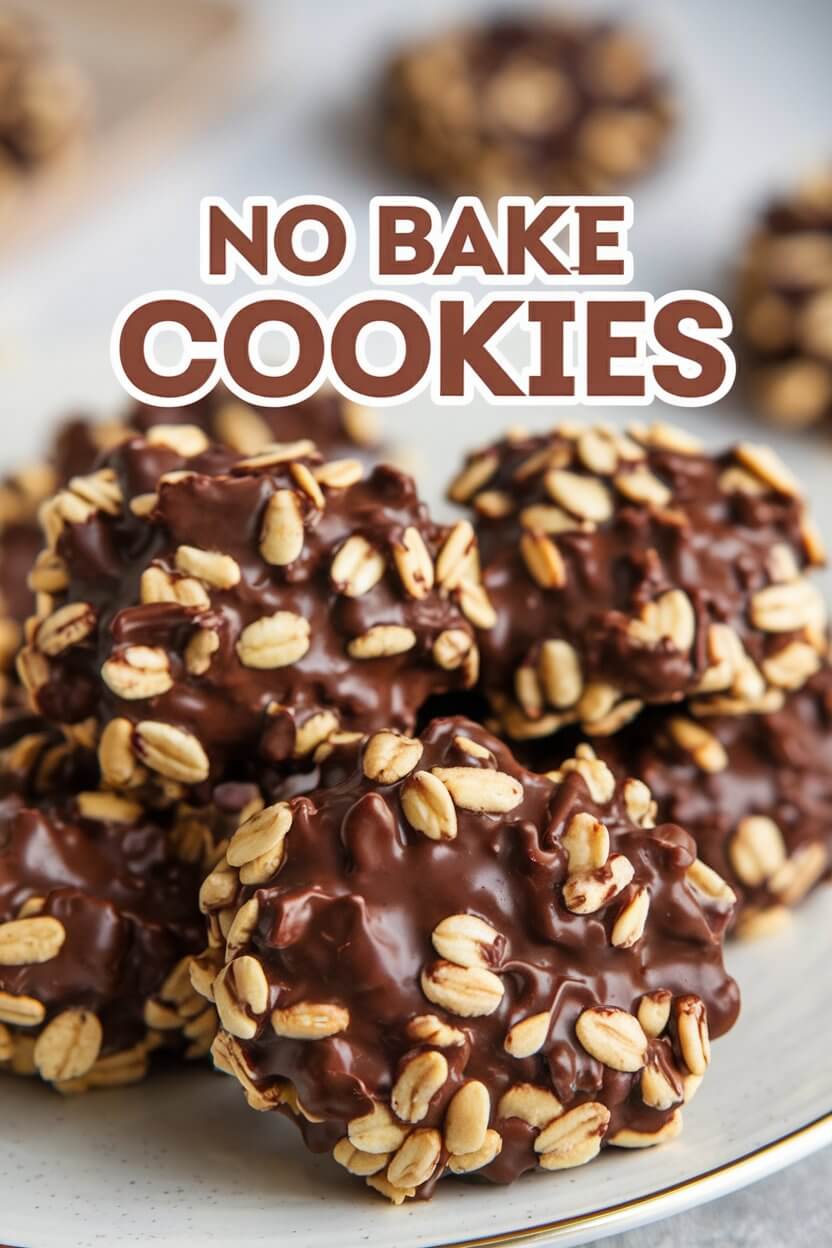
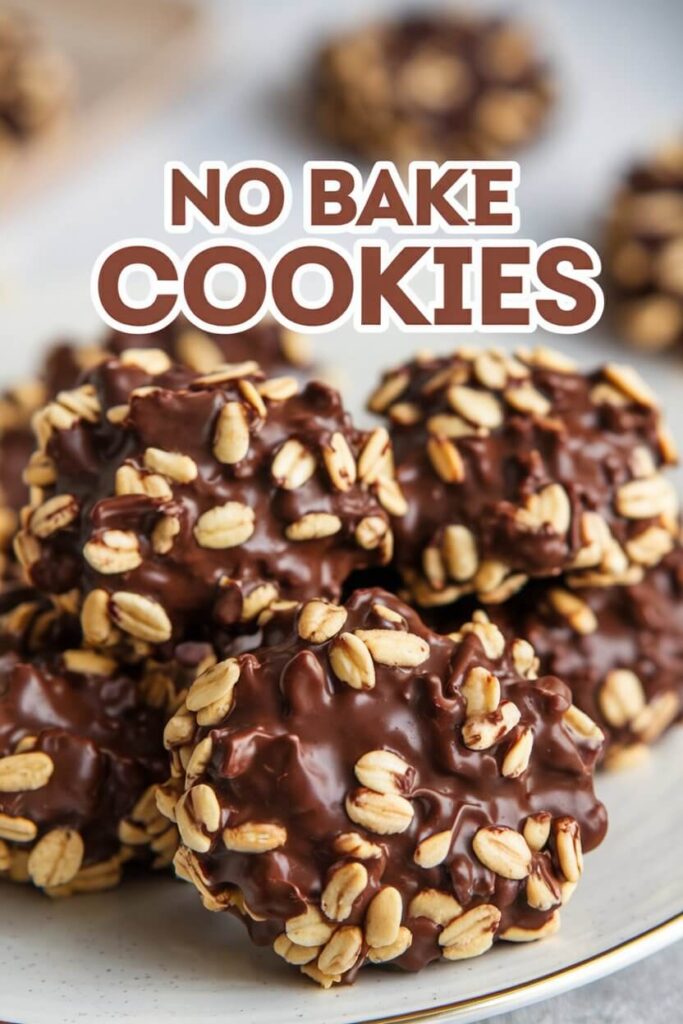
Delicious No-Bake Chocolate Oatmeal Cookies

by donnyvicky February 7, 2025
written by donnyvicky

Looking for a quick and easy treat that satisfies your sweet tooth without turning on the oven? These no-bake chocolate oatmeal cookies are perfect for you! They combine the rich flavors of cocoa with the delightful texture of oats, making them an irresistible snack that everyone will love.

Imagine biting into a chewy yet crunchy cookie that tastes like a chocolate dream. The best part? They come together in just a few minutes and can be enjoyed almost immediately. Whether you’re hosting a gathering or just craving something sweet, these cookies will be a hit.

Yummy Chocolate Oatmeal Cookies
Ingredients

  • 1 cup granulated sugar
  • 1/2 cup unsweetened cocoa powder
  • 1/2 cup milk
  • 1/2 cup butter
  • 3 cups quick oats
  • 1 teaspoon vanilla extract
  • 1/2 cup peanut butter (optional)

Instructions

  1. Prepare a baking sheet by lining it with parchment paper.
  2. In a saucepan, combine sugar, cocoa powder, milk, and butter. Bring the mixture to a boil over medium heat, stirring frequently.
  3. Once boiling, let it cook for 1-2 minutes without stirring, then remove from heat.
  4. Stir in quick oats, vanilla extract, and peanut butter (if using) until well combined.
  5. Drop spoonfuls of the mixture onto the prepared baking sheet and let them cool until set, about 30 minutes.

Cook and Prep Times

  • Prep Time: 10 minutes
  • Cook Time: 5 minutes
  • Total Time: 45 minutes

Nutrition Information

  • Servings: 24 cookies
  • Calories: 130kcal
  • Fat: 5g
  • Protein: 2g
  • Carbohydrates: 19g
February 7, 2025 0 comments
0 FacebookTwitterPinterestEmail
DinnerMeat LoversQuick & EasyRecipes

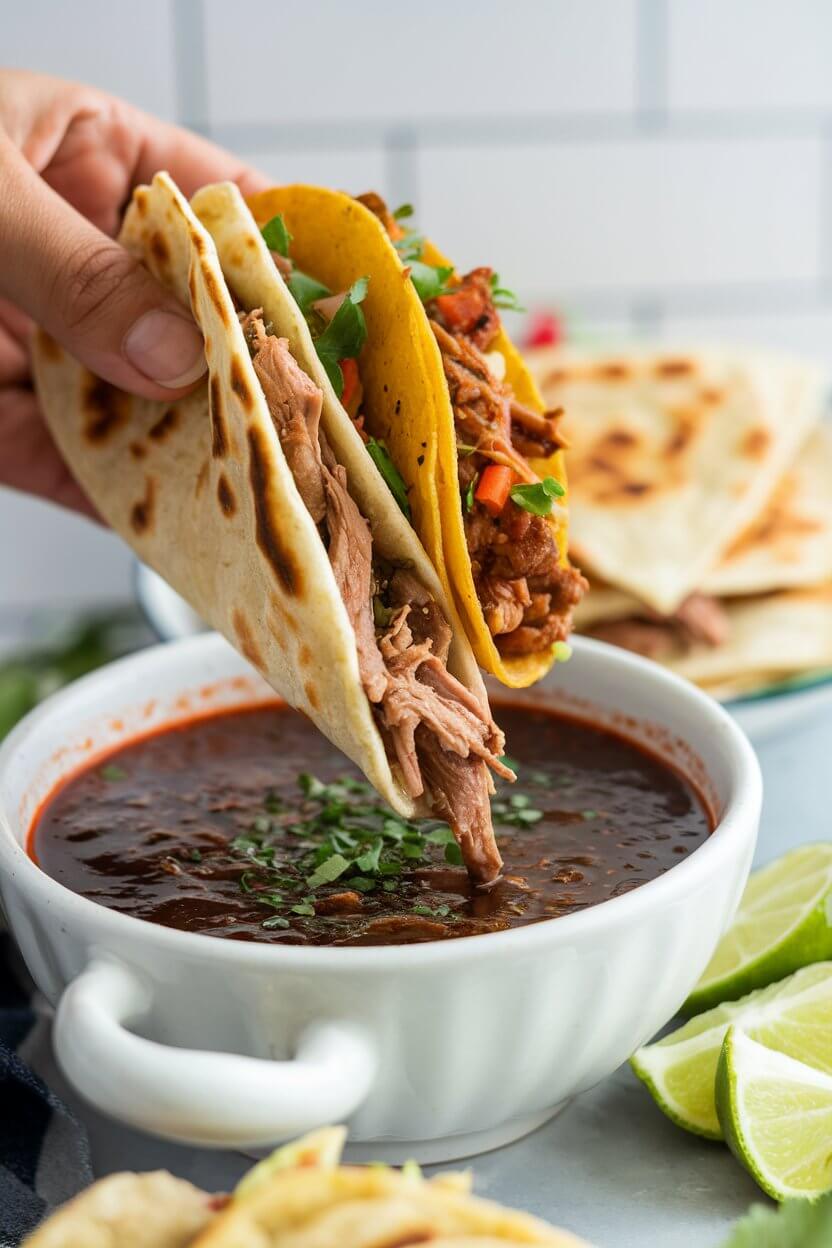
Authentic Birria Tacos Recipe

by donnyvicky February 7, 2025
written by donnyvicky

Have you ever craved a dish that transports you straight to the heart of Mexican cuisine? These Birria tacos are not just a meal; they are a celebration of flavors and traditions. Perfect for gatherings or a special treat, they deliver an explosion of taste that will leave everyone wanting more.

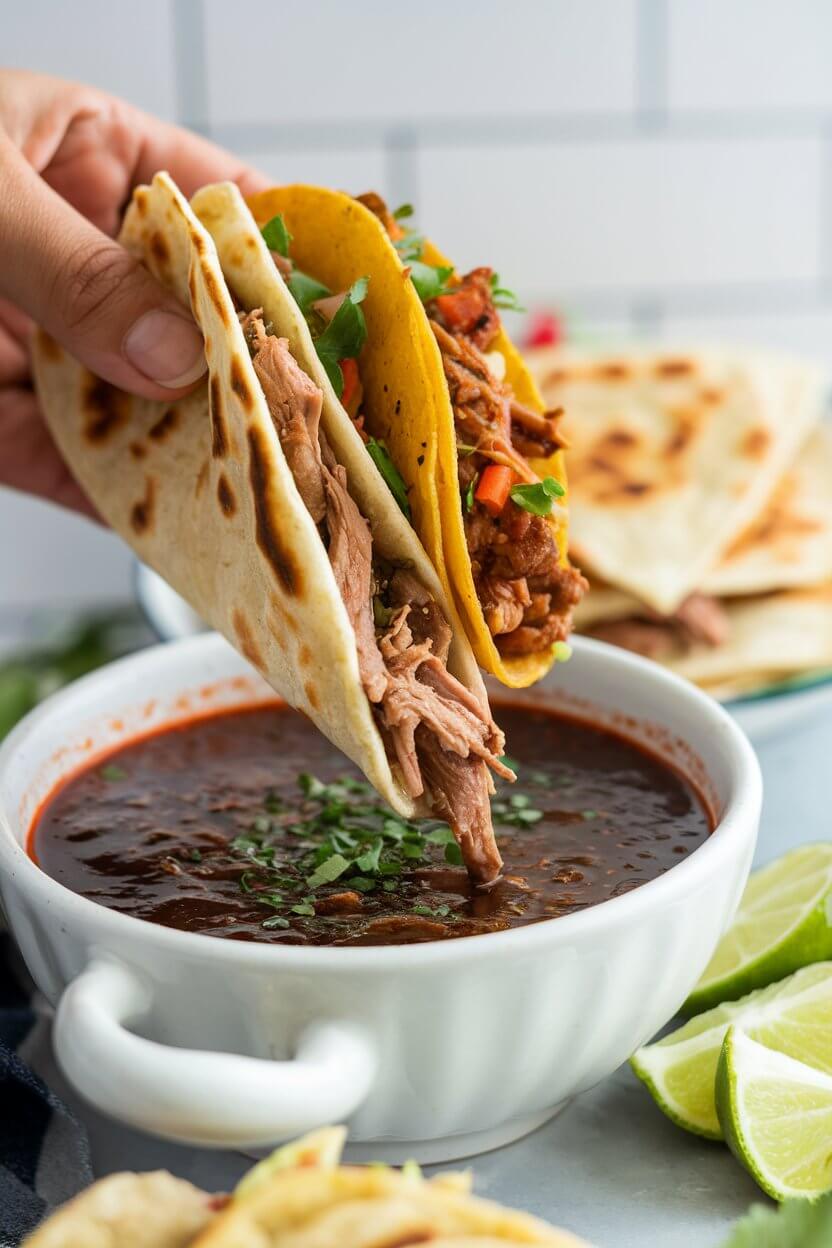
Birria is a traditional Mexican dish that features tender, slow-cooked meat soaked in a rich, aromatic sauce. These tacos are filled with that delicious meat, topped with fresh onions and cilantro, and served with a side of savory consomé for dipping. If you’re looking for a hearty meal that warms the soul, these tacos will not disappoint.

This recipe is a true labor of love, but the results are worth every minute. With a bit of preparation, you can create a dish that showcases robust flavors and textures, making you feel like a master chef in your own kitchen.

How to Make Delicious Birria Tacos

These Birria tacos feature tender, juicy meat enveloped in soft corn tortillas. The combination of spices and the slow-cooking process creates a rich, savory flavor profile that is both comforting and satisfying.

Ingredients

  • 2 lbs beef chuck roast or goat meat, cut into chunks
  • 4 dried guajillo chilies, stems and seeds removed
  • 2 dried ancho chilies, stems and seeds removed
  • 4 cloves garlic
  • 1 medium onion, quartered
  • 2 tsp cumin
  • 1 tsp dried oregano
  • 1/2 tsp black pepper
  • 1/2 tsp cinnamon
  • 4 cups beef broth
  • Salt to taste
  • 12 corn tortillas
  • Chopped onion and cilantro for garnish
  • Lime wedges for serving

Instructions

  1. Prepare the Chilies: In a dry skillet, toast the guajillo and ancho chilies until fragrant. Soak them in hot water for about 15 minutes until softened.
  2. Make the Sauce: In a blender, combine the soaked chilies, garlic, onion, cumin, oregano, black pepper, cinnamon, and a bit of beef broth. Blend until smooth.
  3. Cook the Meat: In a large pot, add the meat, the blended sauce, remaining beef broth, and salt. Bring to a boil, then reduce the heat to low. Cover and simmer for 2-3 hours, until the meat is tender and easily shredded.
  4. Shred the Meat: Remove the meat from the pot and shred it with a fork. Strain the broth and reserve it for serving.
  5. Assemble the Tacos: Heat the corn tortillas on a skillet. Fill each tortilla with shredded meat, and top with chopped onion and cilantro.
  6. Serve: Serve the tacos with a side of warm consomé for dipping and lime wedges for squeezing on top.

Cook and Prep Times

  • Prep Time: 30 minutes
  • Cook Time: 3 hours
  • Total Time: 3 hours 30 minutes

Nutrition Information

  • Servings: 6 tacos
  • Calories: 350kcal
  • Fat: 20g
  • Protein: 30g
  • Carbohydrates: 20g
February 7, 2025 0 comments
0 FacebookTwitterPinterestEmail
DrinksNon-Alcoholic & MocktailsQuick & EasyRecipes

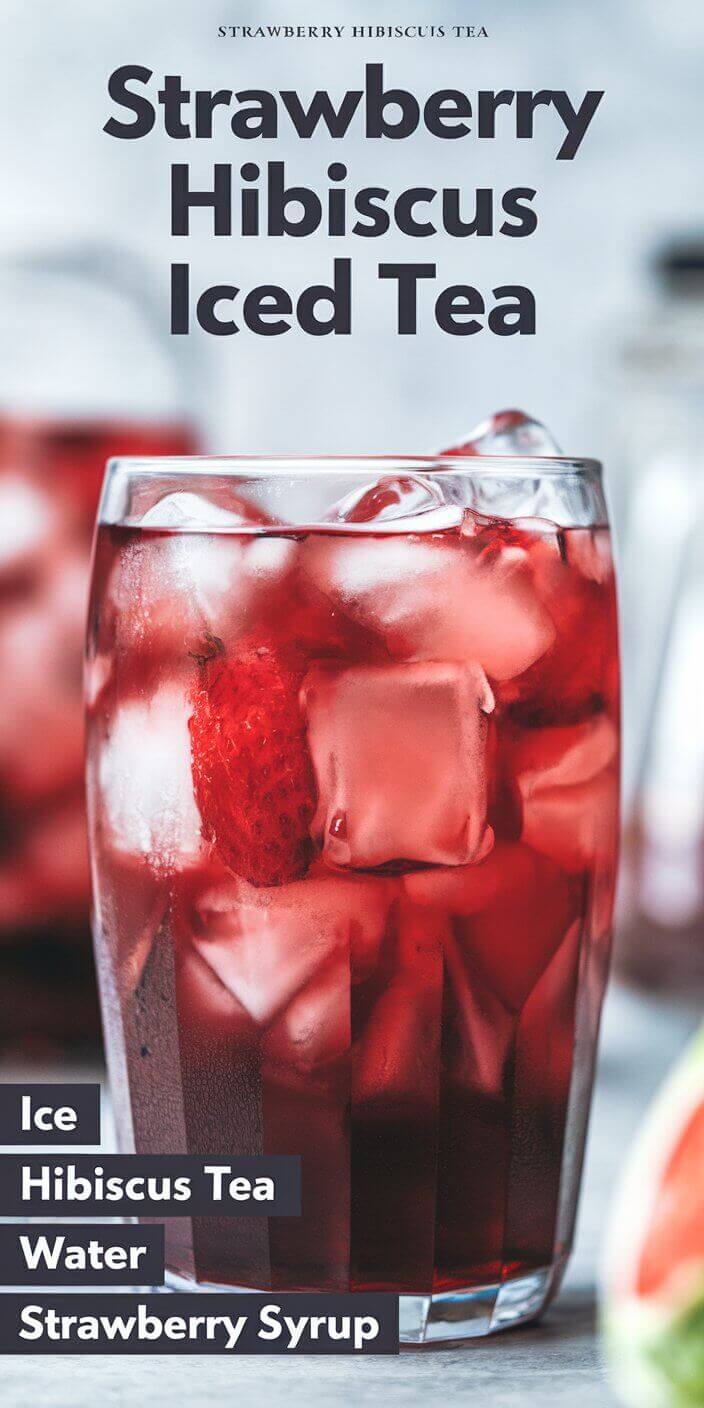
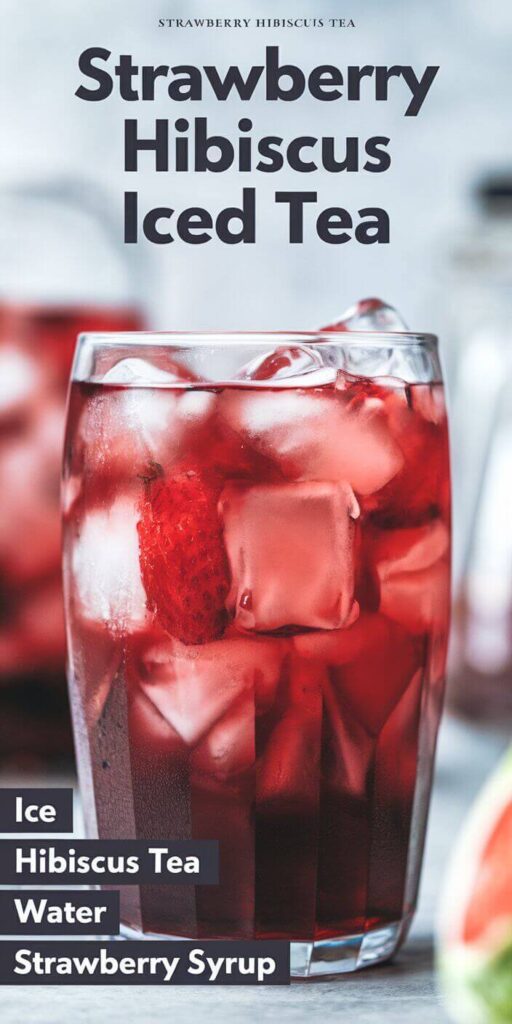
Refreshing Strawberry Hibiscus Iced Tea Recipe

by donnyvicky February 7, 2025
written by donnyvicky

Imagine sipping a cool, vibrant drink on a hot summer day. This Strawberry Hibiscus Iced Tea combines the tartness of hibiscus with the sweetness of fresh strawberries, creating a refreshing beverage that’s perfect for relaxing afternoons or gatherings with friends.

This iced tea recipe is not only visually stunning with its deep red color but also offers a deliciously sweet and tangy flavor profile. It’s the perfect balance of fruity brightness and floral notes, making it a favorite in the warmer months.

A Perfect Summer Refreshment

This Strawberry Hibiscus Iced Tea is a delightful blend of dried hibiscus flowers, fresh strawberries, and a hint of sweetness. It’s a refreshing drink that can be served over ice, making it a perfect thirst-quencher during hot days. The flavor is bright and tangy with a subtle sweetness from the strawberries, leaving you feeling revitalized.

Ingredients

  • 4 cups water
  • 1 cup dried hibiscus flowers
  • 1/2 cup fresh strawberries, hulled and sliced/ strawberry syrup
  • 1/4 cup honey or sweetener of choice (adjust to taste)
  • Ice cubes
  • Fresh mint leaves for garnish (optional)

Instructions

  1. Boil Water: In a saucepan, bring the water to a boil.
  2. Steep Hibiscus: Once boiling, remove from heat and add the dried hibiscus flowers. Let it steep for about 10 minutes.
  3. Strain Tea: Strain the hibiscus tea into a pitcher, discarding the flowers.
  4. Add Strawberries: Stir in the sliced strawberries and honey. Allow it to cool to room temperature, then refrigerate until chilled.
  5. Serve: Serve the iced tea over ice and garnish with fresh mint leaves if desired.

Cook and Prep Times

  • Prep Time: 10 minutes
  • Cook Time: 10 minutes
  • Total Time: 20 minutes plus chilling time

Nutrition Information

  • Servings: 4 servings
  • Calories: 60kcal
  • Fat: 0g
  • Protein: 0g
  • Carbohydrates: 16g
February 7, 2025 0 comments
0 FacebookTwitterPinterestEmail
DrinksNon-Alcoholic & MocktailsQuick & EasyRecipes

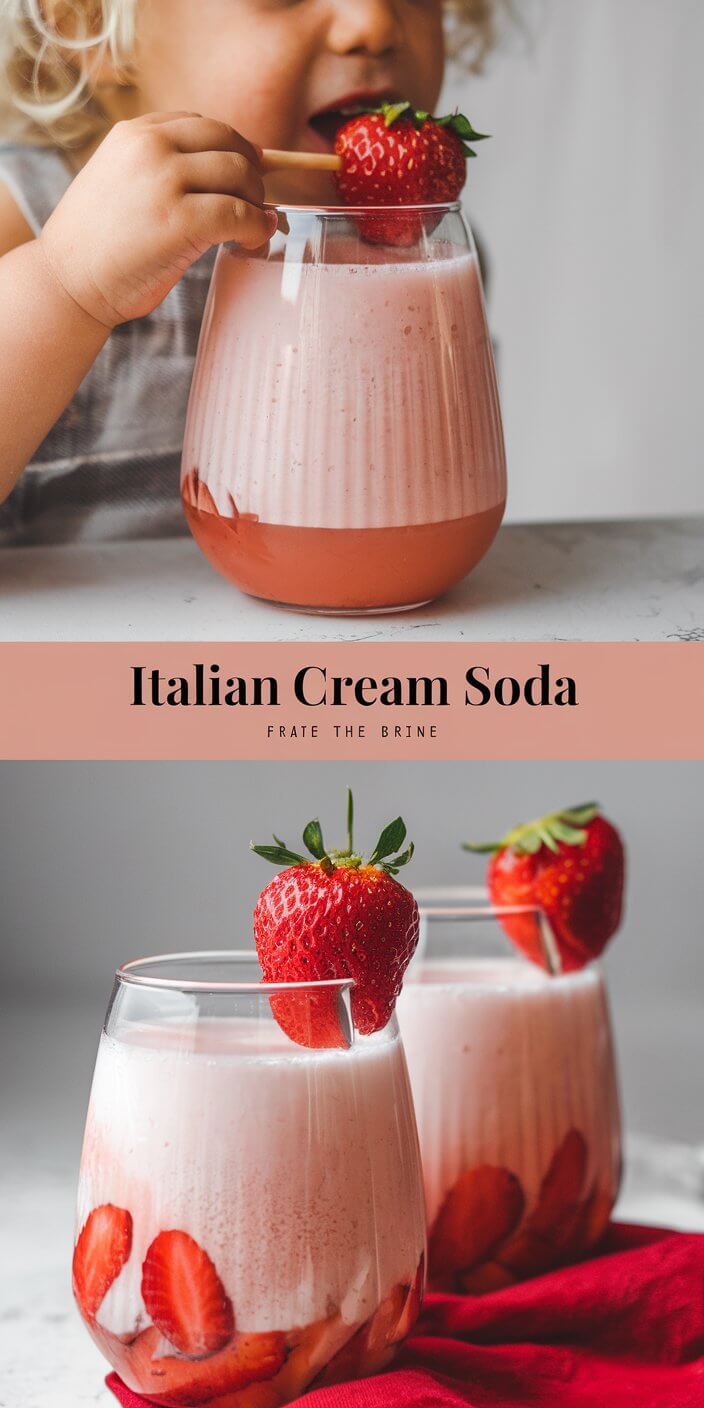
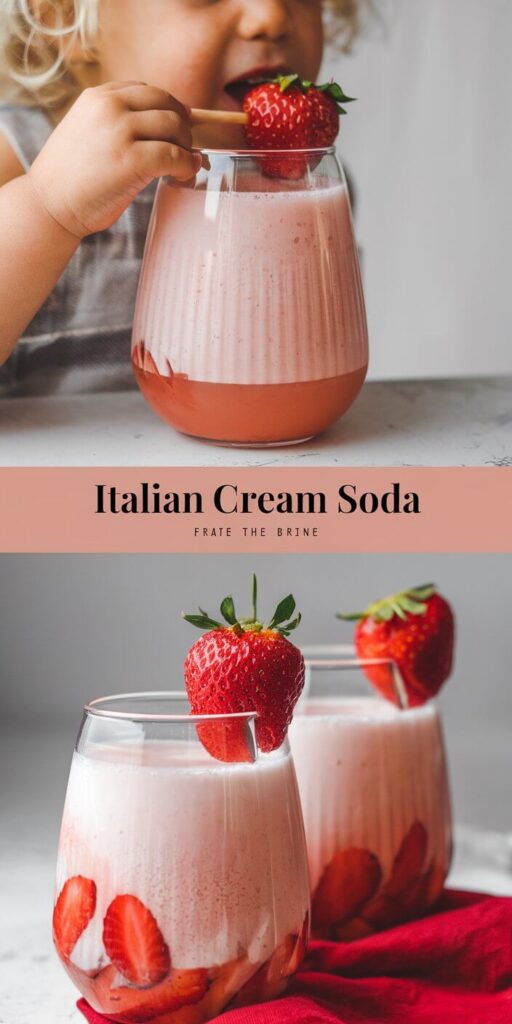
Homemade Italian Cream Soda Recipe

by donnyvicky February 7, 2025
written by donnyvicky

Looking for a refreshing beverage that’s both fizzy and creamy? This Homemade Italian Cream Soda is the perfect choice. It’s a delightful mix of flavored syrup, sparkling water, and cream, making it a fun treat for any occasion. Whether you’re hosting a party or just treating yourself, this drink is sure to impress.

The best part? You can customize it with your favorite syrup flavors, from raspberry to vanilla, allowing you to create your own signature drink. This recipe is not just about satisfying your thirst; it’s about adding a twist of joy to your day.

Easy and Refreshing Italian Cream Soda

This Italian Cream Soda is a bubbly delight that combines sweetness from the flavored syrup with the richness of cream. It’s a perfect balance of flavors that dances on your palate, making it an instant favorite for both kids and adults alike.

Ingredients

  • 1 cup soda water or club soda
  • 2-4 tablespoons flavored syrup (like raspberry, vanilla, or almond)
  • 1/4 cup heavy cream or half-and-half
  • Ice cubes
  • Whipped cream for topping (optional)
  • Fresh fruit or mint leaves for garnish (optional)

Instructions

  1. Prepare the Glass: Fill a tall glass with ice cubes.
  2. Add Syrup: Pour the flavored syrup over the ice. Adjust the amount based on your sweetness preference.
  3. Pour Soda: Slowly add the soda water to the glass, allowing it to mix with the syrup.
  4. Add Cream: Gently pour the heavy cream on top. You can stir it slightly for a marbled effect or leave it layered for visual appeal.
  5. Garnish: Top with whipped cream and garnish with fresh fruit or mint leaves if desired. Serve immediately with a straw.

Cook and Prep Times

  • Prep Time: 5 minutes
  • Total Time: 5 minutes

Nutrition Information

  • Servings: 1
  • Calories: 200kcal
  • Fat: 10g
  • Protein: 1g
  • Carbohydrates: 23g
February 7, 2025 0 comments
0 FacebookTwitterPinterestEmail
Cocktails & SpiritsDrinksQuick & EasyRecipes

Refreshing Watermelon Mojito Recipe

by donnyvicky February 7, 2025
written by donnyvicky

Summer is the perfect season for a cool, invigorating drink, and this Watermelon Mojito captures that essence beautifully. With its sweet watermelon flavor and refreshing mint notes, it’s the ultimate thirst-quencher on a hot day. Whether you’re lounging by the pool or hosting a backyard barbecue, this mojito will surely impress your guests.

This recipe is easy to whip up and can be made in batches for gatherings. The combination of juicy watermelon, zesty lime, and fragrant mint creates a drink that’s not only tasty but visually appealing too. Plus, the vibrant pink color makes it a delightful addition to any summer party.

Ultimate Watermelon Mojito for Hot Days

This Watermelon Mojito is a light and refreshing cocktail that balances the sweetness of fresh watermelon with the tartness of lime and the coolness of mint. Served over ice, it’s a delightful way to stay hydrated and enjoy the flavors of summer.

Ingredients

  • 2 cups fresh watermelon, cubed
  • 10 fresh mint leaves, plus more for garnish
  • 1 lime, juiced
  • 2 tablespoons sugar or simple syrup (adjust to taste)
  • 1 cup white rum
  • Sparkling water to top off
  • Ice cubes

Instructions

  1. Prepare the Watermelon: In a blender, puree the watermelon cubes until smooth. Strain through a fine mesh sieve into a bowl to remove pulp, if desired.
  2. Muddle Mint and Lime: In a sturdy glass, add the mint leaves and lime juice. Use a muddler or the back of a spoon to gently crush the mint leaves, releasing their flavor.
  3. Combine Ingredients: Add the watermelon juice and sugar (or simple syrup) to the mint mixture. Stir to combine until the sugar dissolves.
  4. Add Rum and Ice: Pour in the white rum and mix well. Fill the glass with ice cubes.
  5. Top Off: Top the drink with sparkling water for a fizzy finish. Stir gently to combine.
  6. Garnish and Serve: Garnish with additional mint leaves or a watermelon slice. Serve immediately and enjoy the refreshing taste!

Cook and Prep Times

  • Prep Time: 10 minutes
  • Total Time: 10 minutes

Nutrition Information

  • Servings: 4 cocktails
  • Calories: 180kcal
  • Fat: 0g
  • Protein: 1g
  • Carbohydrates: 18g
February 7, 2025 0 comments
0 FacebookTwitterPinterestEmail
DinnerQuick & EasyRecipes

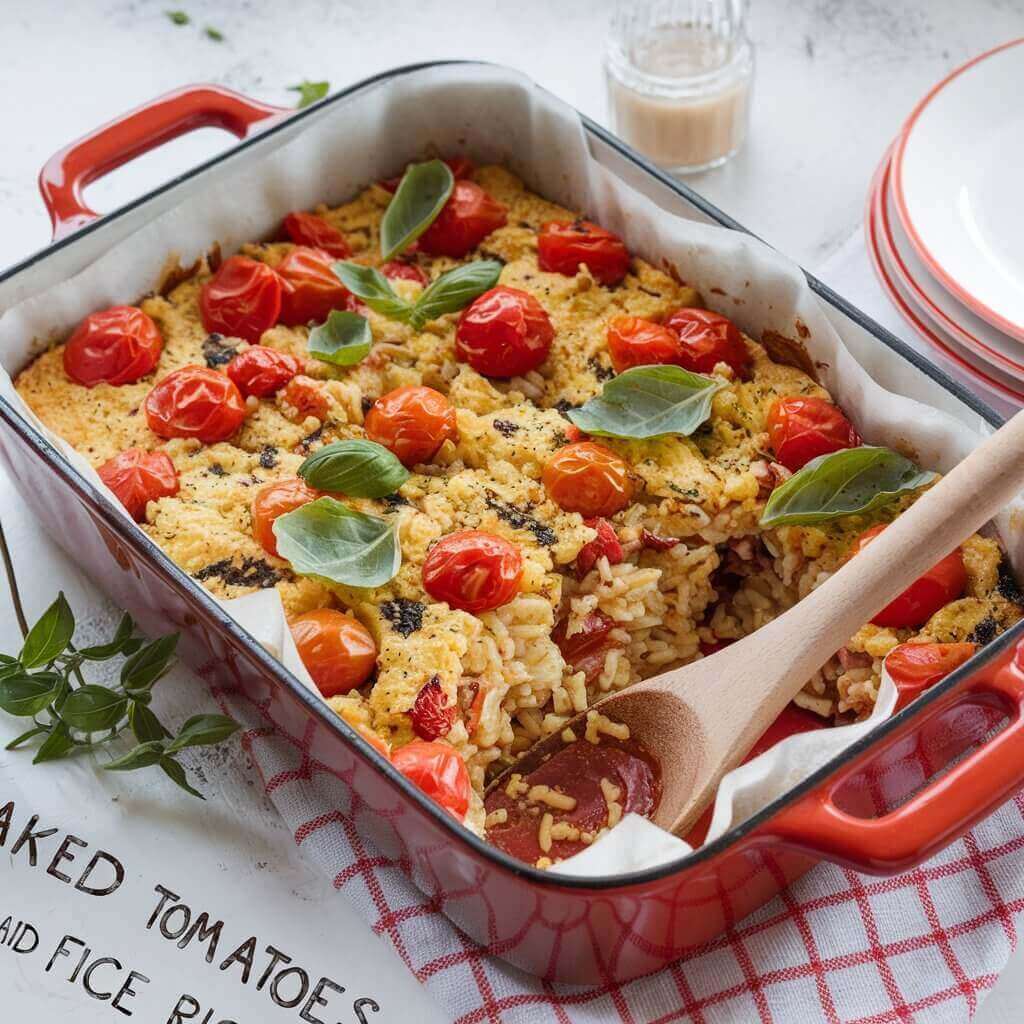
Baked Tomato and Feta Rice Casserole

by donnyvicky February 7, 2025
written by donnyvicky

Imagine coming home to the inviting aroma of baked rice infused with sweet tomatoes and creamy feta. This dish is a simple yet satisfying meal that effortlessly combines flavors for a delightful dining experience. Perfect for weeknight dinners or meal prep, it boasts minimal ingredients and maximum taste.

This baked tomato and feta rice recipe is not only easy to make, but it also brings a medley of flavors that dance on your palate. The rich, tangy tomatoes perfectly complement the salty feta, creating a dish that’s both comforting and refreshing.

Whether you’re serving it as a side dish or a main course, this recipe is versatile and sure to impress. It’s a delightful way to enjoy the wholesome goodness of tomatoes and feta cheese in every bite.

Delicious Baked Tomato and Feta Rice

This baked tomato and feta rice casserole features fluffy rice cooked in a luscious tomato sauce, topped with crumbled feta that melts beautifully. The dish is savory, slightly tangy, and pleasantly cheesy, making it an ideal comfort food choice.

Ingredients

  • 1 cup uncooked long-grain rice
  • 2 cups vegetable or chicken broth
  • 1 can (14 oz) diced tomatoes with juices
  • 1 cup crumbled feta cheese
  • 1 small onion, finely chopped
  • 3 cloves garlic, minced
  • 1 tablespoon olive oil
  • 1 teaspoon dried oregano
  • Salt and pepper to taste
  • Fresh basil or parsley for garnish

Instructions

  1. Preheat the Oven: Preheat your oven to 375°F (190°C).
  2. Sauté Aromatics: In a large oven-safe skillet, heat the olive oil over medium heat. Add the chopped onion and garlic, and sauté until the onion is translucent (about 3-4 minutes).
  3. Combine Ingredients: Stir in the uncooked rice, diced tomatoes (with their juices), broth, dried oregano, salt, and pepper. Bring to a simmer.
  4. Bake: Once simmering, remove from heat and sprinkle the crumbled feta on top. Cover the skillet with a lid or aluminum foil and bake in the preheated oven for about 25-30 minutes, or until the rice is tender and has absorbed the liquid.
  5. Finish and Serve: Remove from the oven and let it sit for a few minutes. Fluff the rice with a fork, garnish with fresh basil or parsley, and serve warm.

Cook and Prep Times

  • Prep Time: 10 minutes
  • Cook Time: 30 minutes
  • Total Time: 40 minutes

Nutrition Information

  • Servings: 4
  • Calories: 320kcal
  • Fat: 12g
  • Protein: 10g
  • Carbohydrates: 40g
February 7, 2025 0 comments
0 FacebookTwitterPinterestEmail
DinnerMeat LoversQuick & EasyRecipes

Creamy Honey-Mustard Chicken Casserole Recipe

by donnyvicky February 7, 2025
written by donnyvicky

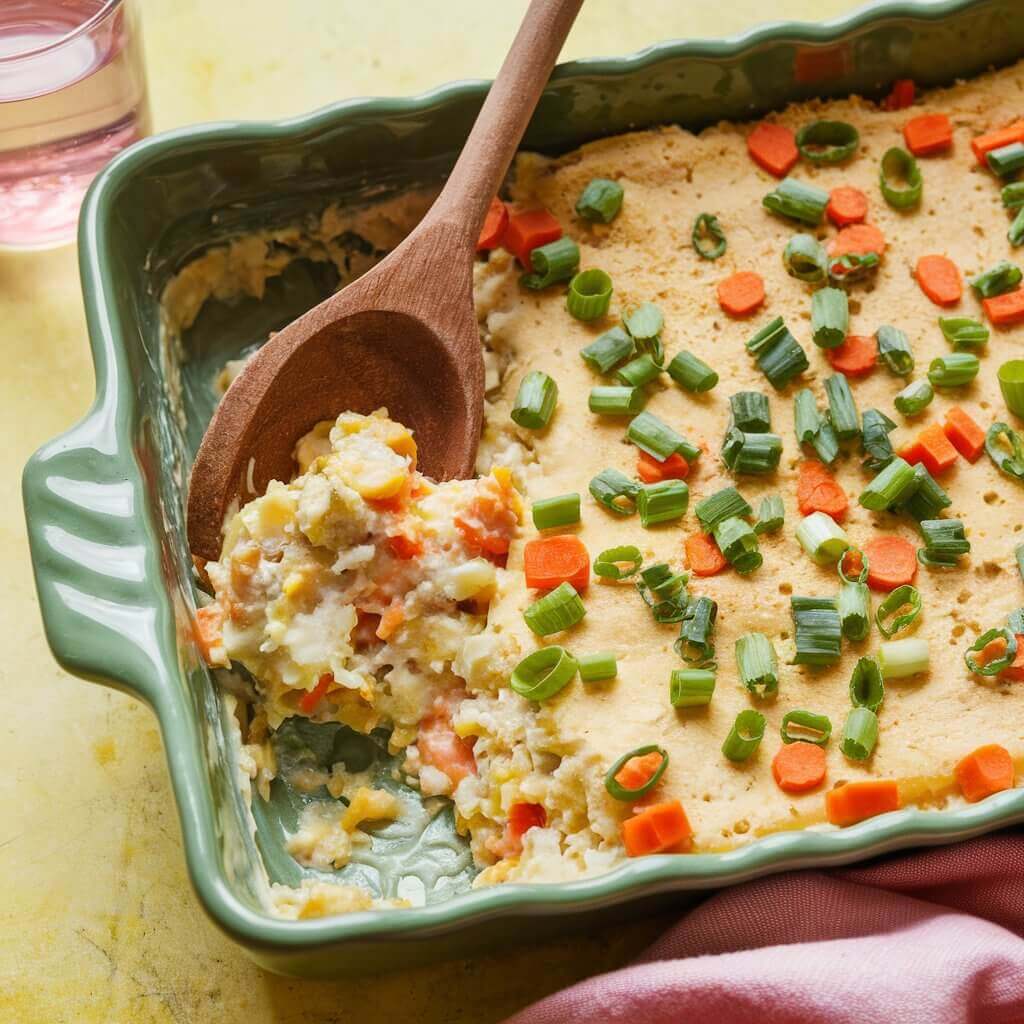
Looking for a comforting dish that brings warmth and smiles to the dinner table? This creamy honey-mustard chicken casserole is just what you need. It’s got that perfect balance of sweet and savory, making it a crowd-pleaser for family dinners or casual gatherings. Plus, it’s easy to prepare and can be enjoyed by everyone.

Imagine tender chicken pieces enveloped in a rich, creamy sauce with a hint of tangy mustard and sweet honey. This casserole is not only satisfying but also offers a delightful contrast of flavors that will leave your taste buds dancing. It’s a dish that feels special yet is simple enough for a weeknight meal.

Delicious Honey-Mustard Chicken Casserole

This honey-mustard chicken casserole features juicy chicken, a creamy sauce, and a crunchy topping that creates a perfect harmony of textures and flavors. It’s a hearty dish that will keep you coming back for more, perfect for any occasion.

Ingredients

  • 4 boneless, skinless chicken breasts, cut into bite-sized pieces
  • 1 cup sour cream
  • 1/2 cup mayonnaise
  • 1/4 cup honey
  • 1/4 cup Dijon mustard
  • 1 teaspoon garlic powder
  • 1 teaspoon onion powder
  • 1 cup shredded cheddar cheese
  • 1 cup breadcrumbs
  • Salt and pepper to taste
  • Spring onions
  • Peas and Carrots
  • Chopped parsley for garnish (optional)

Instructions

  1. Preheat the Oven: Preheat your oven to 350°F (175°C).
  2. Prepare the Sauce: In a large bowl, mix together the sour cream, mayonnaise, honey, Dijon mustard, garlic powder, onion powder, salt, and pepper until well combined.
  3. Combine Chicken: Add the chicken pieces to the sauce and stir until the chicken is fully coated.
  4. Assemble the Casserole: Pour the chicken mixture into a greased baking dish. Sprinkle shredded cheddar cheese evenly over the top.
  5. Add Crunch: In a small bowl, mix the breadcrumbs with a bit of melted butter, then sprinkle over the cheese layer.
  6. Bake: Bake in the preheated oven for 30-35 minutes, or until the chicken is cooked through and the top is golden and bubbly.
  7. Sprinkle the peas, carrots and spring onions
  8. Serve: Let it cool slightly before serving. Garnish with chopped parsley if desired.

Cook and Prep Times

  • Prep Time: 15 minutes
  • Cook Time: 35 minutes
  • Total Time: 50 minutes

Nutrition Information

  • Servings: 6
  • Calories: 350kcal
  • Fat: 20g
  • Protein: 25g
  • Carbohydrates: 18g
February 7, 2025 0 comments
0 FacebookTwitterPinterestEmail
DinnerQuick & EasyRecipesVegetarians

Lemon Garlic Broccoli Piccata Recipe

by donnyvicky February 7, 2025
written by donnyvicky

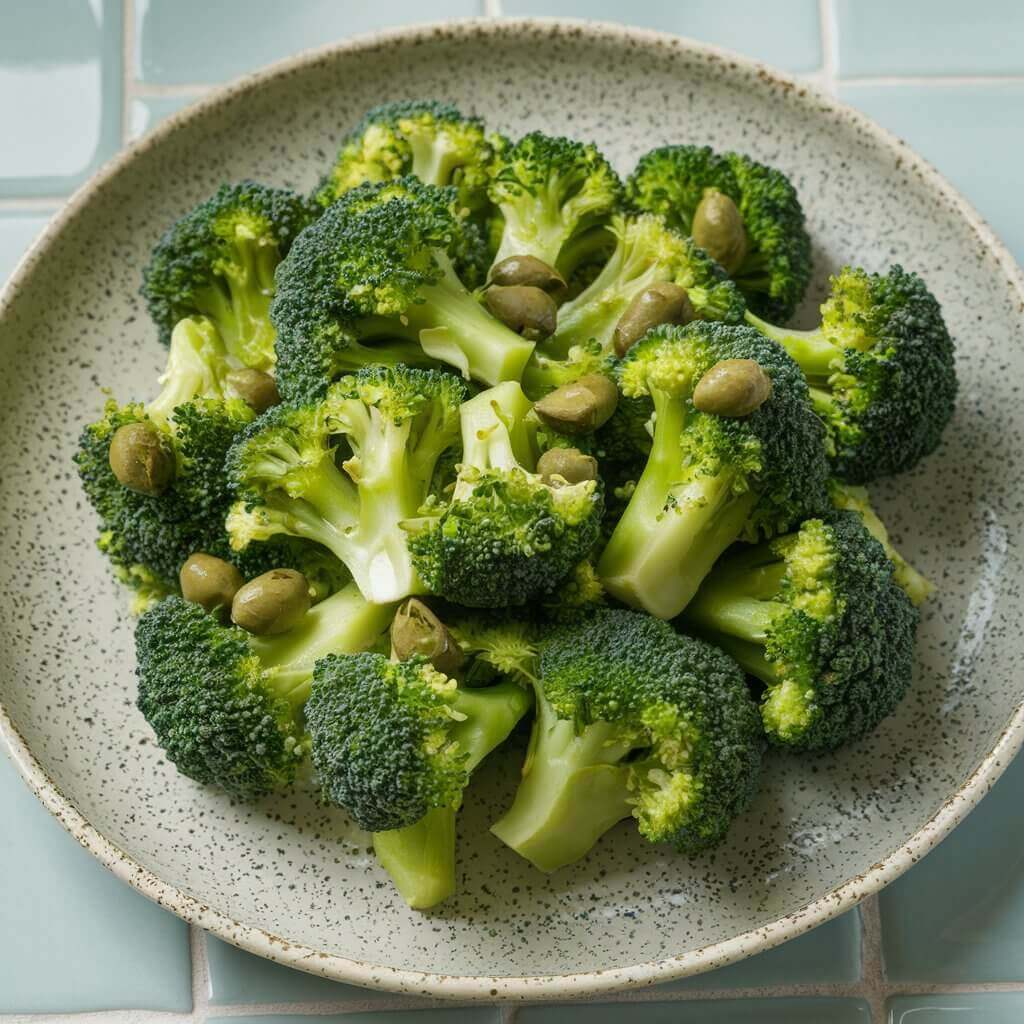
If you’re looking for a vibrant and zesty side dish, this Lemon Garlic Broccoli Piccata is just the ticket. It’s a delightful twist on the classic piccata, featuring fresh broccoli tossed in a tangy lemon and garlic sauce. Perfect for any occasion, this dish brings a burst of flavor to your dinner table.

Imagine tender, bright green broccoli bathed in a savory sauce that balances the richness of butter with the freshness of lemon. This recipe not only elevates your vegetable game but also makes healthy eating feel indulgent. Plus, it’s quick to prepare, making it an excellent choice for busy weeknights.

A Refreshing Take on Broccoli

This Lemon Garlic Broccoli Piccata is a refreshing dish that beautifully combines the flavors of garlic, lemon, and capers. The broccoli remains crisp-tender, allowing its natural flavor to shine through while being complemented by the zesty sauce.

Ingredients

  • 1 pound fresh broccoli florets
  • 2 tablespoons olive oil
  • 3 cloves garlic, minced
  • 1/4 cup fresh lemon juice
  • 1 tablespoon capers, rinsed and drained
  • 2 tablespoons butter
  • Salt and pepper to taste
  • Lemon wedges for garnish
  • Chopped fresh parsley for garnish

Instructions

  1. Blanch the Broccoli: Bring a pot of salted water to a boil. Add the broccoli florets and cook for 2-3 minutes until bright green and tender-crisp. Drain and immediately plunge into ice water to stop cooking. Drain again and set aside.
  2. Prepare the Sauce: In a large skillet, heat olive oil over medium heat. Add minced garlic and sauté for about 1 minute until fragrant, being careful not to burn it.
  3. Combine Ingredients: Stir in the lemon juice and capers, then add the blanched broccoli to the pan. Toss to coat the broccoli in the sauce.
  4. Finish with Butter: Add the butter to the skillet, allowing it to melt and create a silky sauce. Season with salt and pepper to taste.
  5. Serve: Transfer the broccoli piccata to a serving dish. Garnish with lemon wedges and chopped parsley before serving.

Cook and Prep Times

  • Prep Time: 10 minutes
  • Cook Time: 10 minutes
  • Total Time: 20 minutes

Nutrition Information

  • Servings: 4
  • Calories: 120kcal
  • Fat: 8g
  • Protein: 3g
  • Carbohydrates: 8g
February 7, 2025 0 comments
0 FacebookTwitterPinterestEmail
DinnerMeat LoversRecipes

Authentic Tacos de Birria Recipe

by donnyvicky February 7, 2025
written by donnyvicky

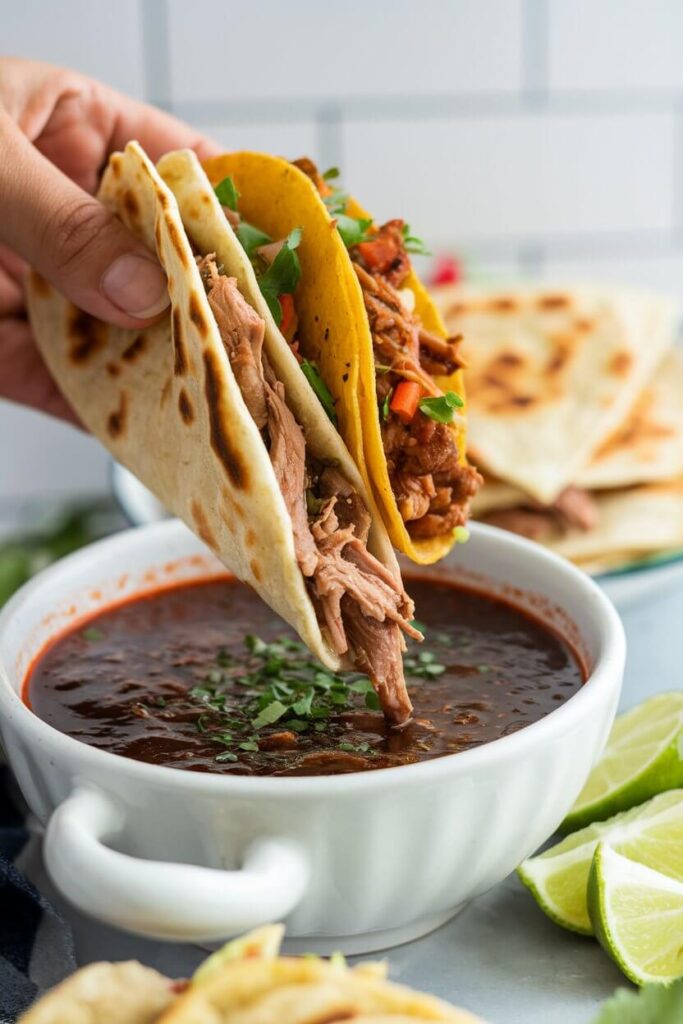
Dive into the world of bold flavors with these Tacos de Birria. This dish is a traditional Mexican favorite known for its rich, savory taste and tender meat, making it a perfect choice for gatherings or a cozy family dinner.

Imagine biting into a taco filled with succulent, slow-cooked beef that has been marinated in a mix of spices and chilies, delivering an explosion of taste with every bite. These tacos are not just food; they’re a celebration of Mexican culture and culinary heritage.

Traditional Tacos de Birria

These Tacos de Birria feature tender, marinated beef, slow-cooked until it falls apart, all wrapped in warm corn tortillas. The taste is a delightful combination of spices, tenderness, and a hint of smokiness from the chiles.

Ingredients

  • 2 lbs beef chuck roast, cut into chunks
  • 4 dried guajillo chilies, seeds removed
  • 2 dried ancho chilies, seeds removed
  • 4 cloves garlic
  • 1 onion, quartered
  • 2 cups beef broth
  • 1 tablespoon apple cider vinegar
  • 1 teaspoon cumin
  • 1 teaspoon oregano
  • Salt and pepper to taste
  • Corn tortillas
  • Chopped onions and cilantro for garnish
  • Lime wedges for serving

Instructions

  1. Prepare the Marinade: In a saucepan, combine the dried chilies, garlic, onion, and beef broth. Bring to a boil, then reduce heat and simmer for about 10 minutes until chilies are soft.
  2. Blend the Marinade: Transfer the mixture to a blender. Add apple cider vinegar, cumin, oregano, salt, and pepper. Blend until smooth.
  3. Marinate the Beef: Place the beef chunks in a large bowl and pour the chili marinade over the top. Cover and marinate in the refrigerator for at least 4 hours, preferably overnight.
  4. Cook the Beef: In a large pot, add the marinated beef and enough water to cover. Bring to a boil, then reduce heat and simmer for about 2 hours, or until the meat is tender and easily shredded.
  5. Prepare Tacos: Remove the beef from the pot, shred it, and set aside. Use the strained cooking liquid as a dipping broth.
  6. Assemble Tacos: Warm the corn tortillas and fill them with shredded beef. Top with chopped onions and cilantro.
  7. Serve: Enjoy your Tacos de Birria with lime wedges and a side of the reserved broth for dipping.

Cook and Prep Times

  • Prep Time: 15 minutes
  • Cook Time: 2 hours
  • Total Time: 2 hours 15 minutes

Nutrition Information

  • Servings: 6 tacos
  • Calories: 300kcal
  • Fat: 15g
  • Protein: 30g
  • Carbohydrates: 20g
February 7, 2025 0 comments
0 FacebookTwitterPinterestEmail
Desserts & SweetsQuick & EasyRecipes

Decadent Red Velvet Oreo Cheesecake

by donnyvicky February 7, 2025
written by donnyvicky

Looking for a show-stopping dessert that combines the rich flavor of red velvet with the creamy goodness of cheesecake? This Red Velvet Oreo Cheesecake is sure to impress at your next gathering. Indulge in layers of velvety red cake and smooth cheesecake, all topped off with crushed Oreo cookies for that perfect crunch. It’s a festive treat that will have everyone asking for seconds.

This cheesecake has a luscious, creamy texture that melts in your mouth, balanced by the slight tanginess of cream cheese. Every bite bursts with flavor, from the chocolaty notes of the Oreos to the subtle sweetness of the red velvet layer. It’s a true dessert lover’s dream that beautifully combines classic elements.

The Perfect Dessert for Any Occasion

This Red Velvet Oreo Cheesecake features a rich, velvety red velvet base topped with a silky cheesecake layer and finished with a crunchy Oreo crust. It’s an irresistible combination that offers both a creamy and slightly tangy flavor profile, making it a delightful end to any meal.

Ingredients

  • 1 ½ cups crushed Oreo cookies
  • ½ cup unsalted butter, melted
  • 1 cup all-purpose flour
  • 1 cup granulated sugar
  • 1 ½ teaspoons baking powder
  • 1 teaspoon cocoa powder
  • ½ teaspoon salt
  • 1 cup vegetable oil
  • 1 cup buttermilk, room temperature
  • 2 large eggs, room temperature
  • 2 tablespoons red food coloring
  • 1 teaspoon vanilla extract
  • 16 oz cream cheese, softened
  • 1 cup powdered sugar
  • 1 teaspoon vanilla extract
  • 1 cup heavy whipping cream, whipped

Instructions

  1. Prepare the Oreo Crust: Preheat your oven to 350°F (175°C). In a mixing bowl, combine the crushed Oreo cookies and melted butter. Press the mixture into the bottom of a 9-inch springform pan to form the crust. Bake for 10 minutes, then let it cool.
  2. Make the Red Velvet Cake: In a bowl, whisk together the flour, granulated sugar, baking powder, cocoa powder, and salt. In another bowl, mix the oil, buttermilk, eggs, food coloring, and vanilla extract. Gradually combine the wet and dry ingredients until smooth. Pour the batter over the cooled crust and bake for 25-30 minutes or until a toothpick comes out clean. Allow to cool completely.
  3. Prepare the Cheesecake Layer: In a large bowl, beat the softened cream cheese with powdered sugar and vanilla extract until smooth. Gently fold in the whipped cream until well combined. Spread the cheesecake mixture over the cooled red velvet layer evenly.
  4. Chill and Serve: Refrigerate the cheesecake for at least 4 hours or overnight to set. Before serving, top with additional crushed Oreos if desired.

Cook and Prep Times

  • Prep Time: 30 minutes
  • Cook Time: 40 minutes
  • Chill Time: 4 hours
  • Total Time: 5 hours 10 minutes

Nutrition Information

  • Servings: 12 slices
  • Calories: 450kcal
  • Fat: 30g
  • Protein: 6g
  • Carbohydrates: 40g
February 7, 2025 0 comments
0 FacebookTwitterPinterestEmail
Newer Posts
Older Posts

Recent Posts

  • Delicious Peanut Butter and Jelly Oatmeal for Kids
  • Nutty Banana Protein Smoothie
  • Savory and Sweet Homemade McGriddle Recipe
  • Keto-Friendly Avocado and Smoked Salmon Breakfast Bowl
  • Deliciously Stuffed French Toast Recipe

Keep in touch

Facebook Twitter Instagram Pinterest Youtube

Popular Recipes

  • 1

    Sweet and Creamy Brown Sugar Vanilla Iced Coffee

    February 6, 2025
  • 2

    Refreshing Whipped Pink Lemonade Recipe

    February 18, 2025
  • 3

    Refreshing Strawberry Tequila Sunrise Recipe

    February 18, 2025
  • 4

    Refreshing Tropical Passion Fruit Smoothie Recipe

    February 18, 2025
  • 5

    Enchanting Sleeping Beauty Cocktail Recipe

    February 18, 2025
  • 6

    Nutty Banana Protein Smoothie

    February 22, 2025

Recent Posts

  • Delicious Peanut Butter and Jelly Oatmeal for Kids

    February 22, 2025
  • Nutty Banana Protein Smoothie

    February 22, 2025
  • Savory and Sweet Homemade McGriddle Recipe

    February 22, 2025

On Pinterest

Categories

  • Breakfast & Brunch (57)
  • Cocktails & Spirits (8)
  • Coffee, Tea & Hot Beverages (12)
  • Desserts & Sweets (61)
  • Dinner (147)
  • Drinks (47)
  • Meat Lovers (95)
  • Non-Alcoholic & Mocktails (17)
  • Quick & Easy (288)
  • Recipes (296)
  • Seafood (27)
  • Smoothies & Shakes (13)
  • Uncategorized (1)
  • Vegan (36)
  • Vegetarians (73)
  • About me
  • Contact Me
  • Privacy Policy
  • Disclaimer
  • Terms of Service
  • Facebook
  • Twitter

@2021 - All Right Reserved. Designed and Developed by PenciDesign


Back To Top
Healthful Plate
  • Home
  • Recipes
    • Vegan
    • Vegetarians
    • Meat Lovers
    • Seafood
    • Desserts & Sweets
    • Breakfast & Brunch
    • Dinner
    • Quick & Easy
  • Drinks
    • Cocktails & Spirits
    • Coffee, Tea & Hot Beverages
    • Non-Alcoholic & Mocktails
    • Smoothies & Shakes
  • Lifestyle
    • Editor’s Pick
    • Kitchen Gadgets