• Home
  • Recipes
    • Vegan
    • Vegetarians
    • Meat Lovers
    • Seafood
    • Desserts & Sweets
    • Breakfast & Brunch
    • Dinner
    • Quick & Easy
  • Drinks
    • Cocktails & Spirits
    • Coffee, Tea & Hot Beverages
    • Non-Alcoholic & Mocktails
    • Smoothies & Shakes
  • Lifestyle
    • Editor’s Pick
    • Kitchen Gadgets
Healthful Plate
keep your memories alive
Desserts & SweetsDrinksQuick & EasyRecipes

Decadent Red Velvet Brownies Recipe

by donnyvicky February 7, 2025
written by donnyvicky

Looking to impress your guests with a dessert that’s both rich and visually stunning? These decadent red velvet brownies are the perfect choice. They bring together the classic flavors of red velvet cake in a fudgy brownie form, making them an irresistible treat at any gathering.

Imagine biting into a soft, moist brownie that has that signature red velvet flavor, complemented by a hint of cocoa and topped with a creamy cream cheese frosting. These brownies are not just a dessert; they are a showstopper that will have everyone asking for the recipe!

Indulge in These Delicious Red Velvet Brownies
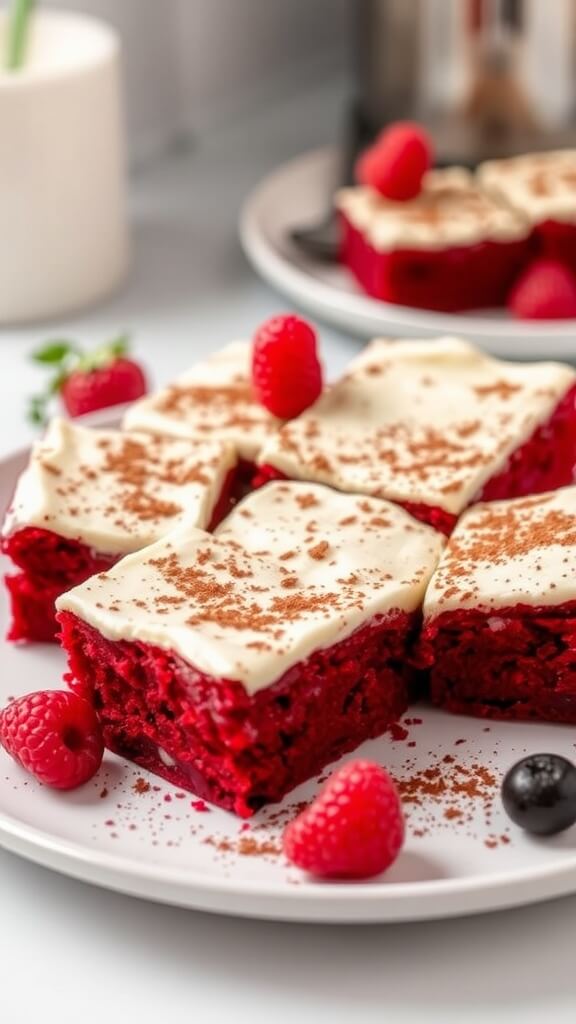
These red velvet brownies are a delightful twist on the classic dessert, featuring a moist brownie base with the unmistakable flavor of red velvet. Topped with luscious cream cheese frosting, they strike the perfect balance of sweetness and richness.

Ingredients

  • 1 cup all-purpose flour
  • 1/2 cup unsweetened cocoa powder
  • 1 cup granulated sugar
  • 1/2 cup unsalted butter, melted
  • 2 large eggs
  • 1 tablespoon red food coloring
  • 1 teaspoon vanilla extract
  • 1/2 teaspoon baking powder
  • 1/4 teaspoon salt
  • 1/2 cup cream cheese, softened
  • 1/4 cup powdered sugar
  • 1 teaspoon vanilla extract (for frosting)

Instructions

  1. Preheat the oven to 350°F (175°C) and grease a 9×9 inch baking pan.
  2. In a bowl, mix together melted butter and sugar until well combined. Add the eggs, food coloring, and vanilla extract, mixing until smooth.
  3. In a separate bowl, whisk together flour, cocoa powder, baking powder, and salt. Gradually add the dry ingredients to the wet mixture, stirring until just combined.
  4. Pour the brownie batter into the prepared pan and spread evenly. Bake for 20-25 minutes, or until a toothpick inserted in the center comes out with a few moist crumbs.
  5. While the brownies cool, prepare the cream cheese frosting by beating together cream cheese, powdered sugar, and vanilla extract until smooth.
  6. Once the brownies are cooled, spread the frosting evenly on top. Cut into squares and serve.

Cook and Prep Times

  • Prep Time: 15 minutes
  • Cook Time: 25 minutes
  • Total Time: 40 minutes

Nutrition Information

  • Servings: 16 brownies
  • Calories: 210kcal
  • Fat: 10g
  • Protein: 3g
  • Carbohydrates: 30g
February 7, 2025 0 comments
0 FacebookTwitterPinterestEmail
Cocktails & SpiritsDrinksRecipes

Tropical Painkiller Cocktail Recipe

by donnyvicky February 6, 2025
written by donnyvicky

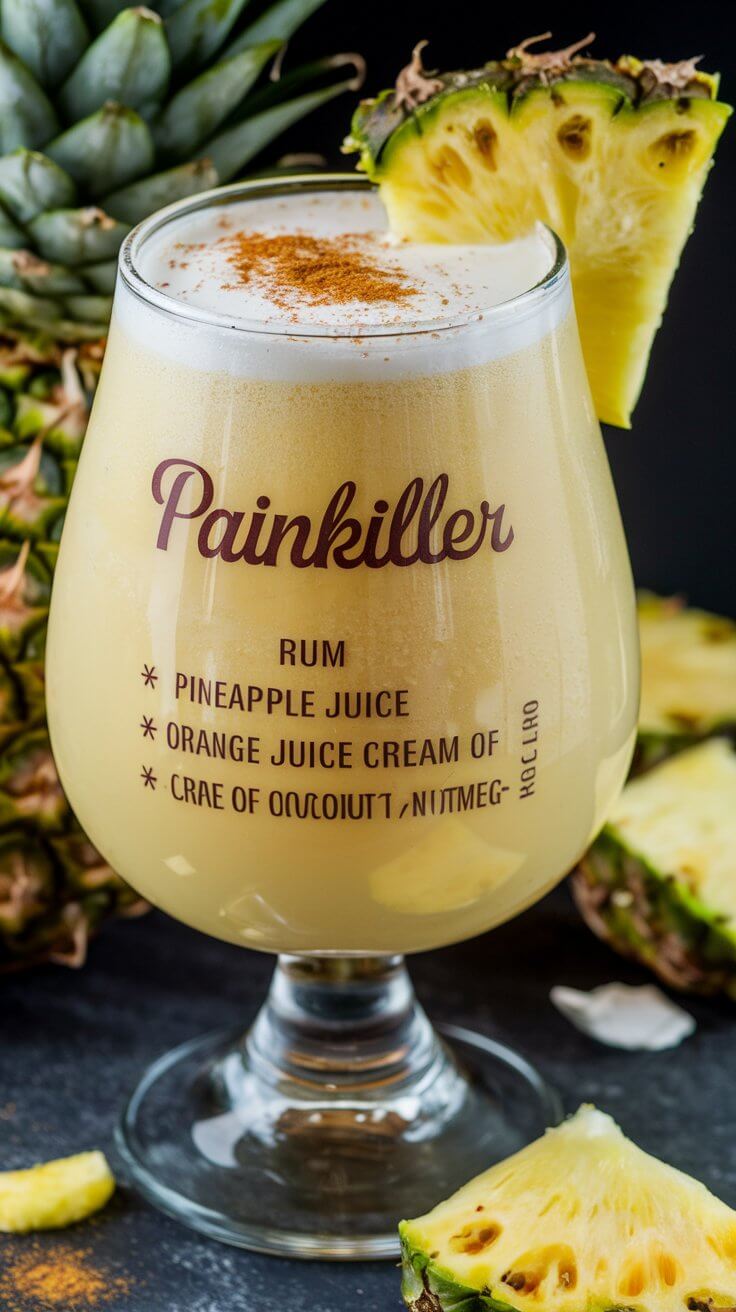
Looking to escape to a tropical paradise without leaving your home? The Painkiller cocktail is your passport to a world of sun-kissed flavors. This drink is a delightful blend of rum, coconut cream, and pineapple juice that will transport you straight to the beach. It’s perfect for warm evenings or summer parties.

Imagine sipping on a creamy, fruity concoction that dances on your palate with notes of coconut, pineapple, and a hint of nutmeg. This cocktail is not just a drink; it’s a refreshing experience, ideal for unwinding after a long day or celebrating with friends.

Refreshing Painkiller Cocktail

The Painkiller cocktail is a luscious mix of dark rum, coconut cream, and fresh pineapple juice, topped with a sprinkle of nutmeg. It’s rich, creamy, and bursting with tropical goodness, making it a perfect choice for anyone looking to enjoy a taste of the islands.

Ingredients

  • 2 ounces dark rum
  • 1 ounce coconut cream
  • 1 ounce pineapple juice
  • 1 ounce orange juice
  • Freshly grated nutmeg for garnish
  • Pineapple wedge and cherry for garnish
  • Ice

Instructions

  1. Combine Ingredients: In a cocktail shaker, add dark rum, coconut cream, pineapple juice, and orange juice.
  2. Shake: Fill the shaker with ice and shake well until thoroughly chilled.
  3. Strain: Strain the mixture into a glass filled with ice.
  4. Garnish: Sprinkle freshly grated nutmeg on top and add a pineapple wedge and a cherry for decoration.
  5. Serve: Enjoy your Painkiller cocktail and feel the tropical vibes!

Cook and Prep Times

  • Prep Time: 5 minutes
  • Total Time: 5 minutes

Nutrition Information

  • Servings: 1 cocktail
  • Calories: 300kcal
  • Fat: 10g
  • Protein: 1g
  • Carbohydrates: 38g
February 6, 2025 0 comments
0 FacebookTwitterPinterestEmail
Cocktails & SpiritsDrinksRecipes

Sweet Seduction Cocktail Recipe

by donnyvicky February 6, 2025
written by donnyvicky

Looking for a cocktail that combines the perfect balance of sweetness and sophistication? The Sweet Seduction cocktail is here to impress. Ideal for a romantic evening or a fun gathering with friends, this drink not only tantalizes the taste buds but also adds a touch of elegance to any occasion.

Imagine sipping on a drink that’s as delightful to look at as it is to taste. With its vibrant colors and refreshing flavors, this cocktail is a feast for the senses. Whether you’re celebrating a special moment or simply enjoying a night in, the Sweet Seduction will elevate your experience.

Refreshing and Elegant Sweet Seduction Cocktail

This cocktail features a harmonious blend of fruity flavors, complemented by a hint of citrus and a smooth finish. It’s sweet, yet not overpowering, making it an ideal choice for those who enjoy a light and refreshing drink.

Ingredients

  • 2 oz vodka
  • 1 oz peach schnapps
  • 1 oz cranberry juice
  • 1 oz orange juice
  • Fresh fruit slices for garnish (peach, orange, or berries)
  • Ice cubes

Instructions

  1. Prepare the Glass: Chill a cocktail glass by filling it with ice water while preparing the drink.
  2. Mix the Ingredients: In a shaker filled with ice, combine the vodka, peach schnapps, cranberry juice, and orange juice.
  3. Shake: Seal the shaker and shake vigorously for about 15 seconds until well mixed and chilled.
  4. Strain: Empty the ice water from the cocktail glass and strain the mixture into the glass.
  5. Garnish: Add fresh fruit slices on top for an elegant touch and serve immediately.

Cook and Prep Times

  • Prep Time: 5 minutes
  • Total Time: 5 minutes

Nutrition Information

  • Servings: 1 cocktail
  • Calories: 200kcal
  • Fat: 0g
  • Protein: 0g
  • Carbohydrates: 20g
February 6, 2025 0 comments
0 FacebookTwitterPinterestEmail
DrinksNon-Alcoholic & MocktailsRecipes

Refreshing Pineapple Ginger Beer Mocktail Recipe

by donnyvicky February 6, 2025
written by donnyvicky

Looking for a fun and invigorating drink that will keep you cool? The Pineapple Ginger Beer Mocktail is your go-to solution. With its tropical pineapple flavor and the zesty kick of ginger, this mocktail is perfect for any gathering or a relaxing day at home.

This drink is not just thirst-quenching; it’s a burst of sunshine in a glass. The natural sweetness of pineapple pairs harmoniously with the spicy notes of ginger beer, creating a delightful balance that will please your taste buds.

Whether you’re hosting a summer barbecue or just want a refreshing beverage to sip on, this mocktail is easy to make and a crowd-pleaser. Plus, it’s non-alcoholic, so everyone can enjoy it!

How to Make a Pineapple Ginger Beer Mocktail

This mocktail combines fresh pineapple juice with ginger beer for a fizzy, tangy drink that’s perfect for any occasion. It’s light, refreshing, and has a hint of spice that sets it apart from ordinary beverages.

Ingredients

  • 2 cups fresh pineapple juice
  • 1 cup ginger beer
  • 1 tablespoon lime juice
  • Pineapple slices for garnish
  • Fresh mint leaves for garnish
  • Ice cubes

Instructions

  1. Prepare the Glass: Fill a glass with ice cubes to chill.
  2. Mix the Ingredients: In a pitcher, combine the fresh pineapple juice and lime juice. Stir well.
  3. Add Ginger Beer: Slowly pour in the ginger beer, stirring gently to combine without losing the fizz.
  4. Serve: Pour the mixture into the prepared glass over ice. Garnish with pineapple slices and fresh mint leaves.
  5. Enjoy: Sip and savor the refreshing flavors of this delightful mocktail!

Cook and Prep Times

  • Prep Time: 5 minutes
  • Total Time: 5 minutes

Nutrition Information

  • Servings: 2 glasses
  • Calories: 120 kcal
  • Fat: 0g
  • Protein: 1g
  • Carbohydrates: 31g
February 6, 2025 0 comments
0 FacebookTwitterPinterestEmail
Breakfast & BrunchDrinksNon-Alcoholic & MocktailsQuick & EasyRecipes

Refreshing Cranberry Sunrise Mocktail Recipe

by donnyvicky February 6, 2025
written by donnyvicky

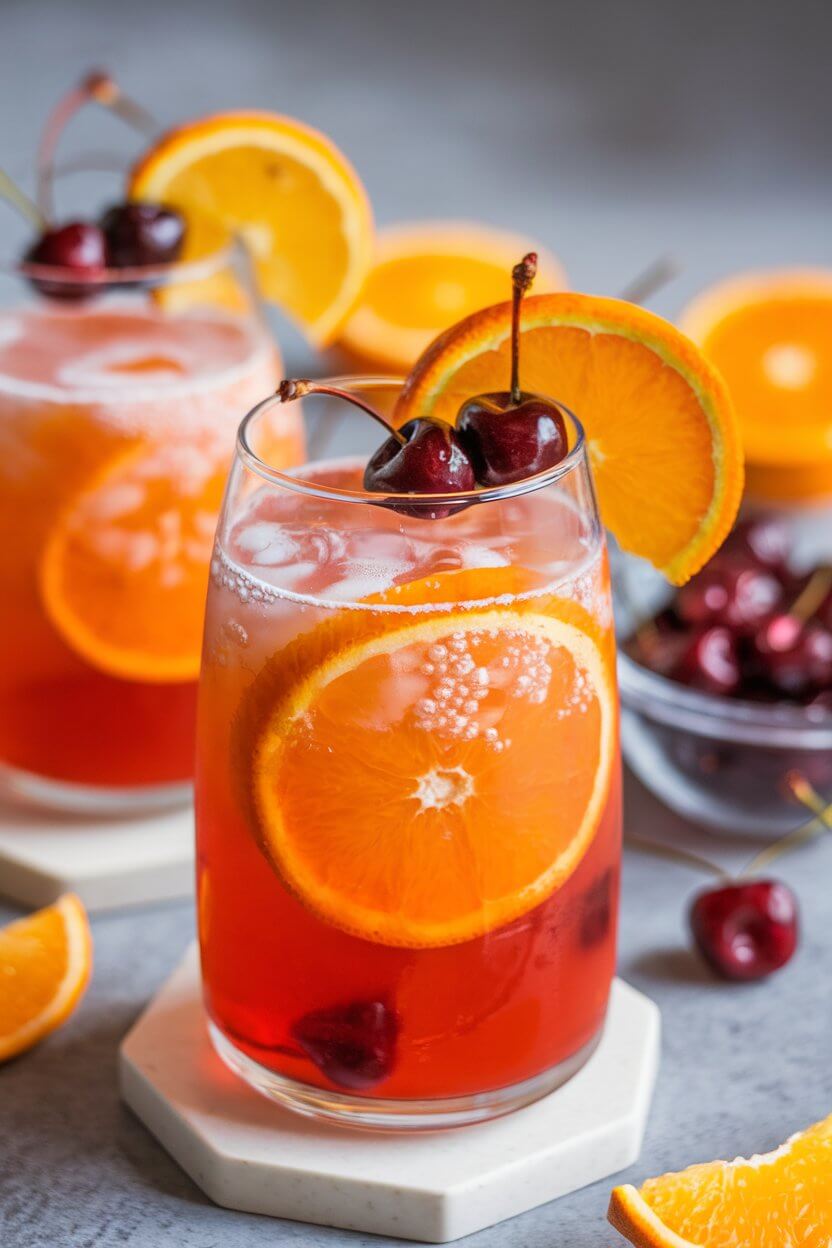
Looking for a vibrant and refreshing drink that’s perfect for any occasion? This Cranberry Sunrise Mocktail is just the thing. With its beautiful layers of color and delightful taste, it’s sure to impress anyone at your gathering. Whether you’re planning a brunch, a summer party, or just want to treat yourself, this non-alcoholic drink is a fabulous choice.

Imagine sipping on a drink that bursts with the tangy flavor of cranberry, complemented by a hint of orange and the effervescence of soda. It’s like a cheerful sunrise in a glass, making it a delightful addition to your beverage repertoire.

Cranberry Sunrise Mocktail

This mocktail combines the tartness of cranberry juice with the sweetness of orange juice, creating a balanced drink that’s both refreshing and satisfying. The contrasting colors make it visually appealing, while the fizz from the soda adds a fun twist.

Ingredients

  • 1 cup cranberry juice
  • 1/2 cup orange juice
  • 1 cup soda water or lemon-lime soda
  • Ice cubes
  • Fresh cranberries and orange slices for garnish

Instructions

  1. Prepare the Glass: Fill a tall glass with ice cubes.
  2. Layer the Juices: Pour the cranberry juice over the ice, followed by the orange juice. Allow the juices to settle for a layered effect.
  3. Add Fizz: Slowly pour the soda water or lemon-lime soda on top to create a beautiful gradient.
  4. Garnish: Add fresh cranberries and an orange slice on the rim of the glass for a decorative touch.
  5. Serve: Enjoy your refreshing Cranberry Sunrise Mocktail immediately!

Cook and Prep Times

  • Prep Time: 5 minutes
  • Total Time: 5 minutes

Nutrition Information

  • Servings: 1 mocktail
  • Calories: 120kcal
  • Fat: 0g
  • Protein: 0g
  • Carbohydrates: 30g
February 6, 2025 0 comments
0 FacebookTwitterPinterestEmail
Coffee, Tea & Hot BeveragesDrinksRecipesUncategorized

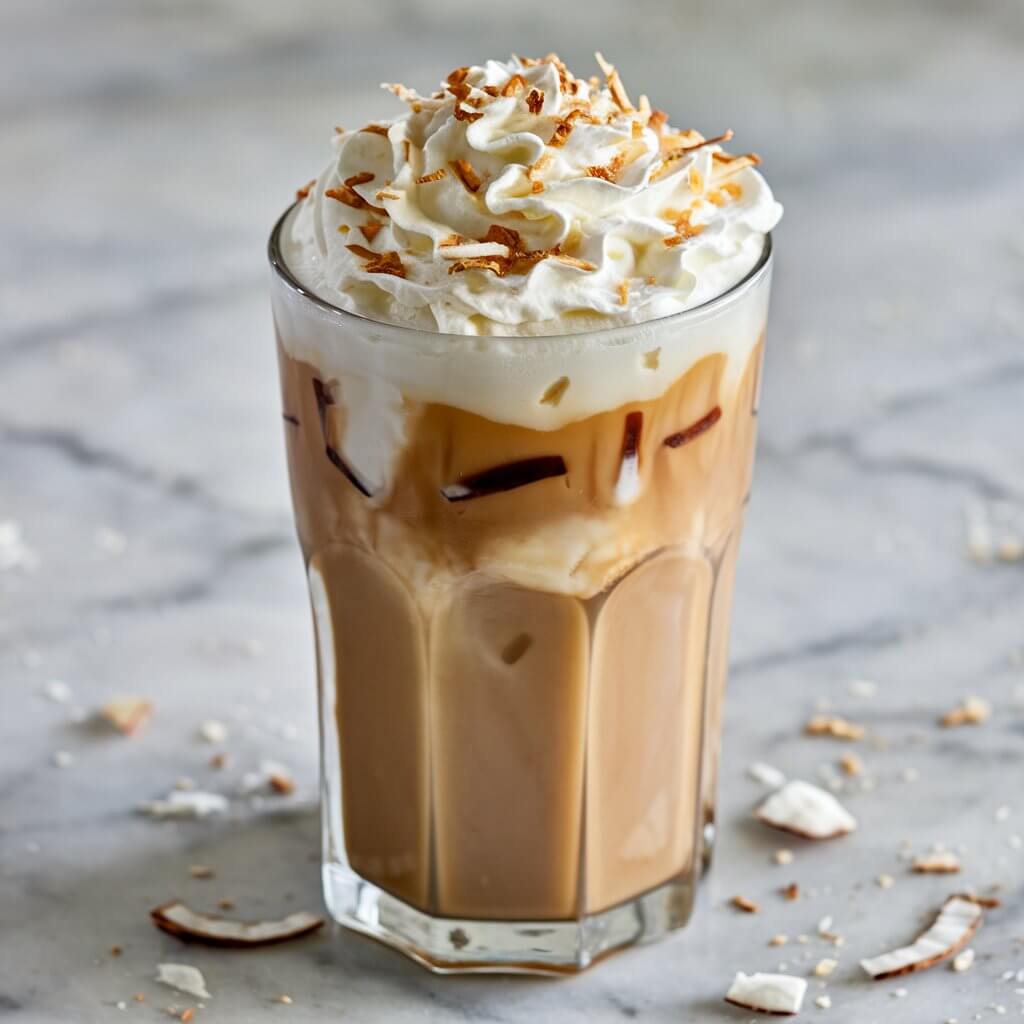
Refreshing Iced Coconut Milk Latte Recipe

by donnyvicky February 6, 2025
written by donnyvicky

Are you looking for a cool drink to energize your day? This Iced Coconut Milk Latte is the perfect refreshing beverage to beat the heat and give you a caffeine boost. With its creamy coconut flavor combined with rich coffee, it’s a delightful treat that feels like a mini vacation in a glass.

Imagine sitting on a sunny terrace, sipping this latte and feeling the cool breeze. The smooth coconut milk adds a tropical touch that will transport you to your favorite beach destination. It’s not just a drink; it’s a moment to savor.

This recipe is super easy to whip up at home. Whether you’re gearing up for a busy day or winding down in the afternoon, this iced latte is a fantastic way to enjoy your coffee in a new light.

How to Make the Perfect Iced Coconut Milk Latte

The Iced Coconut Milk Latte combines the rich flavors of freshly brewed coffee with the creamy texture of coconut milk. It’s a sweet, nutty, and slightly tropical drink that’s both refreshing and satisfying, making it a perfect companion for warm days.

Ingredients

  • 1 cup brewed coffee, cooled
  • 1/2 cup coconut milk
  • 1-2 tablespoons sweetener (such as honey or maple syrup) to taste
  • Ice cubes
  • Optional: shredded coconut or cocoa powder for garnish

Instructions

  1. Brew the Coffee: Prepare your favorite coffee method and let it cool to room temperature, or use leftover coffee.
  2. Mix the Ingredients: In a tall glass, combine the cooled coffee with coconut milk and sweetener. Stir to combine.
  3. Add Ice: Fill the glass with ice cubes to chill the mixture.
  4. Garnish and Serve: If desired, sprinkle with shredded coconut or cocoa powder for a decorative touch. Serve immediately and enjoy your refreshing iced latte!

Cook and Prep Times

  • Prep Time: 5 minutes
  • Total Time: 5 minutes

Nutrition Information

  • Servings: 1 glass
  • Calories: 150 kcal
  • Fat: 10g
  • Protein: 1g
  • Carbohydrates: 15g
February 6, 2025 0 comments
0 FacebookTwitterPinterestEmail
Coffee, Tea & Hot BeveragesDrinksQuick & EasyRecipes

Sweet and Creamy Brown Sugar Vanilla Iced Coffee

by donnyvicky February 6, 2025
written by donnyvicky

Looking for a refreshing pick-me-up that combines the rich flavors of coffee with a hint of sweetness? This Brown Sugar Vanilla Iced Coffee is the perfect solution. It’s not just your regular iced coffee; this delightful drink brings together the warm notes of brown sugar with the smooth essence of vanilla, creating a beverage that’s both invigorating and comforting.

Imagine sipping on this iced coffee while lounging on a sunny patio or enjoying a leisurely afternoon. The sweetness from the brown sugar paired with the creamy finish makes each sip a delightful experience. Plus, it’s super easy to whip up at home, giving you the freedom to enjoy café-quality drinks without stepping outside.

The Ultimate Brown Sugar Vanilla Iced Coffee Recipe

This iced coffee is a perfect blend of robust coffee, rich brown sugar, and luscious vanilla. It’s sweet, creamy, and incredibly refreshing, making it an ideal beverage for warm days or anytime you crave a little indulgence.

Ingredients

  • 1 cup brewed coffee, cooled
  • 2 tablespoons brown sugar
  • 1 teaspoon vanilla extract
  • 1/2 cup milk or cream (dairy or non-dairy)
  • Ice cubes
  • Whipped cream for topping (optional)
  • A sprinkle of cocoa or cinnamon for garnish (optional)

Instructions

  1. Brew the Coffee: Prepare your favorite coffee and allow it to cool to room temperature or chill it in the refrigerator.
  2. Mix the Sweetness: In a glass, combine the cooled coffee, brown sugar, and vanilla extract. Stir until the brown sugar is completely dissolved.
  3. Add Creaminess: Pour in the milk or cream of your choice and mix well. Adjust sweetness by adding more brown sugar if desired.
  4. Serve: Fill a glass with ice cubes and pour the coffee mixture over the ice. Top with whipped cream and a sprinkle of cocoa or cinnamon, if using.
  5. Enjoy: Grab a straw or a spoon, and enjoy your sweet and creamy brown sugar vanilla iced coffee!

Cook and Prep Times

  • Prep Time: 5 minutes
  • Total Time: 5 minutes

Nutrition Information

  • Servings: 1 glass
  • Calories: 180kcal
  • Fat: 8g
  • Protein: 3g
  • Carbohydrates: 20g
February 6, 2025 0 comments
0 FacebookTwitterPinterestEmail
Breakfast & BrunchQuick & EasyRecipes

Sausage, Egg, and Cream Cheese Hash Brown Breakfast Casserole

by donnyvicky February 6, 2025
written by donnyvicky

This breakfast casserole combines savory sausage, fluffy eggs, and creamy cheese, all nestled within a bed of crispy hash browns. It’s the perfect dish to start your day or serve at brunch gatherings. Not only is it delicious, but it also brings everyone together around the table, making it a perfect choice for family mornings or special occasions.

Imagine the smell of this casserole baking in the oven, filling your kitchen with mouthwatering aromas. Each bite offers a satisfying blend of textures and flavors – the crispy hash browns, the richness of the cream cheese, and the hearty sausage create a delightful harmony that will have everyone coming back for seconds.

Easy and Delicious Breakfast Casserole

This hearty casserole is a comforting combination of seasoned sausage, fluffy scrambled eggs, and smooth cream cheese layered over golden hash browns. It’s a filling breakfast that’s perfect for feeding a crowd or meal-prepping for the week ahead.

Ingredients

  • 1 pound breakfast sausage, crumbled
  • 10 large eggs
  • 1 cup cream cheese, softened
  • 2 cups frozen hash browns, thawed
  • 1 cup shredded cheddar cheese
  • 1/2 teaspoon garlic powder
  • 1/2 teaspoon onion powder
  • Salt and pepper to taste
  • Chopped green onions for garnish (optional)

Instructions

  1. Preheat the Oven: Preheat your oven to 350°F (175°C).
  2. Cook the Sausage: In a skillet over medium heat, cook the crumbled sausage until browned and cooked through. Drain excess grease.
  3. Mix the Egg Mixture: In a large bowl, whisk together the eggs, softened cream cheese, garlic powder, onion powder, salt, and pepper until well combined.
  4. Layer the Hash Browns: In a greased 9×13 inch baking dish, spread the thawed hash browns evenly across the bottom.
  5. Add Sausage: Sprinkle the cooked sausage over the hash browns.
  6. Pour Egg Mixture: Carefully pour the egg mixture over the sausage and hash browns, ensuring even distribution.
  7. Top with Cheese: Sprinkle shredded cheddar cheese over the top of the casserole.
  8. Bake: Bake in the preheated oven for 30-35 minutes, or until the eggs are set and the top is golden.
  9. Serve: Let it cool slightly before slicing. Garnish with chopped green onions if desired, and enjoy your delicious breakfast casserole!

Cook and Prep Times

  • Prep Time: 15 minutes
  • Cook Time: 35 minutes
  • Total Time: 50 minutes

Nutrition Information

  • Servings: 8 servings
  • Calories: 350kcal
  • Fat: 25g
  • Protein: 20g
  • Carbohydrates: 15g
February 6, 2025 0 comments
0 FacebookTwitterPinterestEmail
Desserts & SweetsQuick & EasyRecipes

Delicious No-Bake Oreo Balls Recipe

by donnyvicky February 6, 2025
written by donnyvicky

Craving a sweet treat that requires no baking and is simply irresistible? These No-Bake Oreo Balls are a delightful combination of crushed Oreos and cream cheese, rolled into bite-sized bliss. They’re perfect for parties, gatherings, or just a sweet indulgence at home.

Imagine sinking your teeth into a rich, chocolatey ball that melts in your mouth, leaving a burst of sweet, creamy flavor. Whether you’re an experienced baker or a kitchen novice, this recipe will have your friends and family asking for seconds — or thirds!

These treats are not only quick and easy to make, but they’re also a fun way to get the kids involved in the kitchen. Just mix, roll, and dip — it doesn’t get much simpler than that!

Irresistible No-Bake Treats

No-bake Oreo balls are a delightful dessert that never fails to impress. These little bites are a wonderful combination of crushed Oreo cookies and creamy goodness, resulting in a treat that pleases any palate. With no baking required, they are perfect for anyone looking for a quick and easy dessert solution.

The beauty of these Oreo balls lies in their simplicity. Just a few ingredients come together to make something truly delicious. The contrast of the crunchy cookie and the velvety cream cheese creates a texture that’s simply delightful, making them irresistible!

Simple Preparation Process

The preparation of these treats is straightforward and fuss-free. Start by crushing up some Oreos, which can be fun, especially for kids who love to help in the kitchen. This can be done in a food processor or simply by using a rolling pin on a zip-top bag.

Once the Oreos are crushed, mix them with softened cream cheese to form a smooth mixture. The blending of these two ingredients is where the magic happens, creating a rich filling that’s easy to roll into small balls. After rolling, a short chill in the refrigerator helps them firm up nicely.

Chocolate Coating and Garnishing

Next comes the delicious chocolate coating. Melting chocolate chips is a breeze, and you can customize the chocolate type based on your preference, whether you choose milk or semi-sweet. Adding a touch of vegetable oil to the chocolate can make the dipping process even smoother.

After dipping the chilled Oreo balls in chocolate, sprinkle them with colorful toppings while the chocolate is still wet. This adds a festive touch and makes them visually appealing, perfect for any celebration.

Perfect for Any Occasion

No-bake Oreo balls are versatile and suitable for various occasions. Whether it’s a birthday party, holiday gathering, or a casual get-together, these treats will be a hit among guests. Their charming presentation and delightful taste ensure they won’t last long on the table!

Serving them on a white plate surrounded by whole Oreos and a dark chocolate bar creates an inviting dessert scene that’s hard to resist. They look great and taste even better, making them an ideal choice for entertaining.

Nutritional Sweetness

For those mindful of their dietary choices, these Oreo balls offer a sweet treat that’s still manageable in moderation. With 120 calories per ball, they provide a satisfying indulgence without overwhelming the calorie count.

Each ball contains a delightful mix of flavors and textures, ensuring you don’t miss out on deliciousness. Just remember to enjoy them as a part of a balanced diet!

Get Creative with Variations

While the classic no-bake Oreo ball is a favorite, there’s plenty of room for creativity! Try experimenting with different flavors by adding extracts or even mixing in other crushed cookies.

Feel free to switch up the toppings too! From crushed nuts to different types of sprinkles, the possibilities are endless. Making these treats your own is part of the fun and creativity!

Quick and Easy No-Bake Oreo Balls

These No-Bake Oreo Balls are rich, creamy, and super chocolatey. The combination of crushed Oreo cookies and cream cheese gives them a deliciously sweet and tangy flavor, while the chocolate coating adds a perfect touch of indulgence.

Ingredients

  • 1 package (15.35 oz) Oreo cookies
  • 1 package (8 oz) cream cheese, softened
  • 2 cups chocolate chips (milk or semi-sweet)
  • 1 tablespoon vegetable oil (optional, for thinning the chocolate)
  • Sprinkles or crushed Oreos for garnish (optional)

Instructions

  1. Crush the Oreos: Place the Oreo cookies in a food processor and pulse until finely crushed. You can also place them in a zip-top bag and crush them with a rolling pin.
  2. Mix with Cream Cheese: In a large bowl, combine the crushed Oreos and softened cream cheese. Mix until well blended and the mixture holds together.
  3. Form the Balls: Use your hands to roll the mixture into small balls, about 1 inch in diameter, and place them on a baking sheet lined with parchment paper.
  4. Chill: Refrigerate the balls for about 30 minutes to help them firm up.
  5. Melt the Chocolate: In a microwave-safe bowl, melt the chocolate chips in 30-second intervals, stirring in between, until smooth. If desired, add vegetable oil to thin the chocolate for easier dipping.
  6. Coat the Balls: Dip each Oreo ball into the melted chocolate, allowing excess chocolate to drip off. Return the coated balls to the parchment-lined baking sheet.
  7. Garnish: If desired, sprinkle with crushed Oreos or sprinkles while the chocolate is still wet.
  8. Chill Again: Refrigerate the coated Oreo balls for about 15 minutes, or until the chocolate is set. Serve and enjoy!

Cook and Prep Times

  • Prep Time: 15 minutes
  • Chill Time: 45 minutes
  • Total Time: 1 hour

Nutrition Information

  • Servings: 24 balls
  • Calories: 120kcal
  • Fat: 7g
  • Protein: 1g
  • Carbohydrates: 14g
February 6, 2025 0 comments
0 FacebookTwitterPinterestEmail
DinnerQuick & EasyRecipesVegetarians

Creamy Vegetarian Tortilla Soup Recipe

by donnyvicky February 6, 2025
written by donnyvicky

Looking for a comforting soup that warms you from the inside out? This creamy vegetarian tortilla soup is not just a dish; it’s a delightful blend of flavors that will transport your taste buds. Whether you’re in need of a quick meal or planning a cozy family dinner, this recipe is guaranteed to please everyone at the table.

Imagine a bowl filled with vibrant vegetables, rich spices, and a touch of creaminess, all topped with crispy tortilla strips. It’s a perfect balance of textures and flavors that come together to create a satisfying experience in every spoonful.

Delicious Vegetarian Tortilla Soup with a Creamy Twist

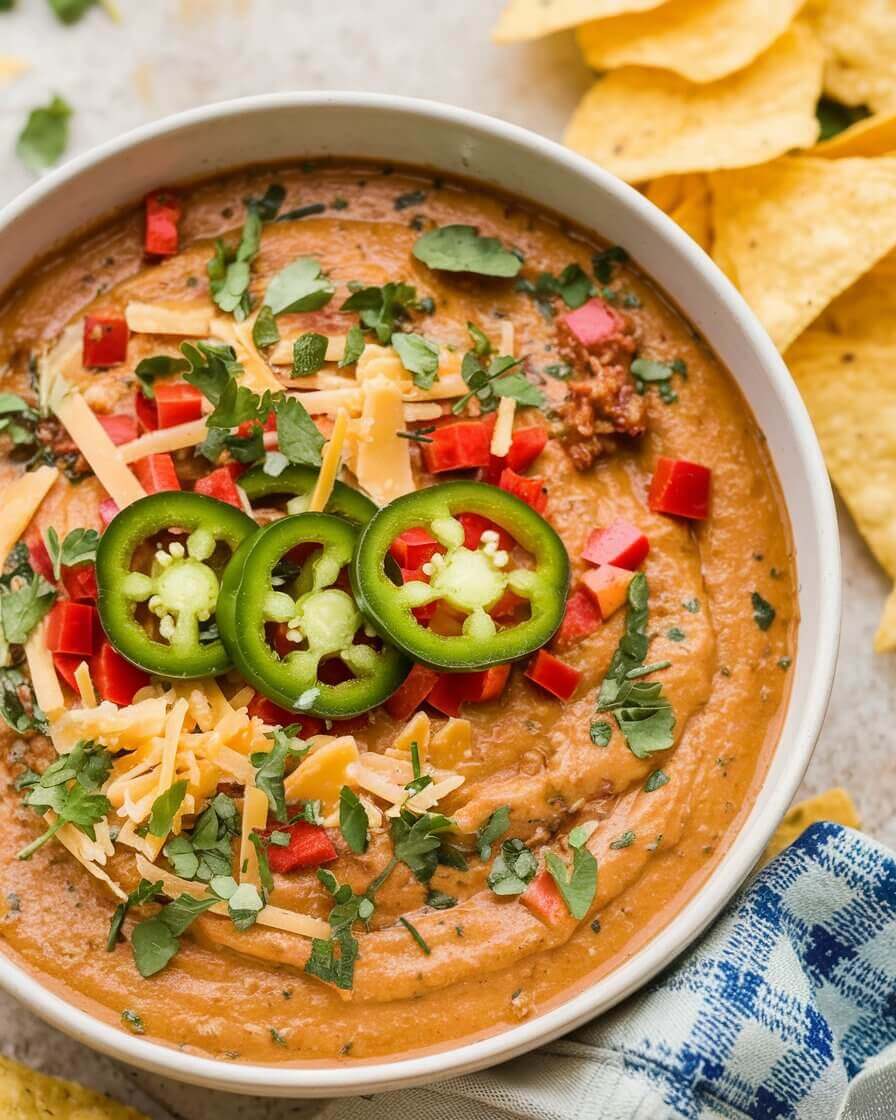
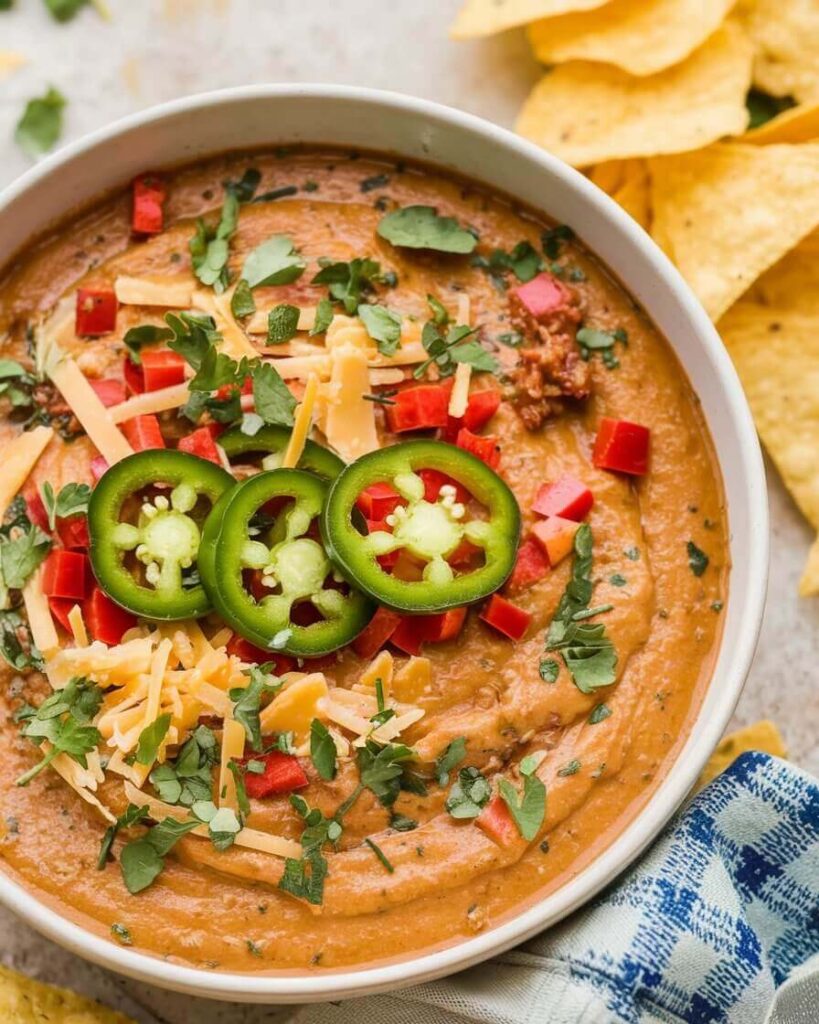
This creamy vegetarian tortilla soup showcases a medley of fresh vegetables, including bell peppers, corn, and black beans, simmered in a flavorful broth. It’s smooth, hearty, and topped with crispy tortilla strips, making it a delightful and satisfying meal.

Ingredients

  • 2 tablespoons olive oil
  • 1 medium onion, chopped
  • 2 garlic cloves, minced
  • 1 bell pepper, diced
  • 1 can (15 oz) black beans, drained and rinsed
  • 1 cup corn kernels (fresh or frozen)
  • 4 cups vegetable broth
  • 1 can (14 oz) diced tomatoes with green chiles
  • 1 teaspoon ground cumin
  • 1 teaspoon chili powder
  • 1/2 cup heavy cream or coconut cream
  • Salt and pepper, to taste
  • Crispy tortilla strips, for serving
  • Chopped cilantro and lime wedges, for garnish

Instructions

  1. Heat the olive oil in a large pot over medium heat. Add the chopped onion and sauté until translucent, about 5 minutes.
  2. Stir in the minced garlic and diced bell pepper. Cook for an additional 3-4 minutes until the bell pepper is tender.
  3. Add the black beans, corn, vegetable broth, diced tomatoes, cumin, and chili powder. Bring the mixture to a boil, then reduce heat and simmer for 15 minutes.
  4. Stir in the heavy cream or coconut cream, and season with salt and pepper to taste. Heat through for another 5 minutes.
  5. Serve the soup hot, topped with crispy tortilla strips, chopped cilantro, and lime wedges.

Cook and Prep Times

  • Prep Time: 10 minutes
  • Cook Time: 30 minutes
  • Total Time: 40 minutes

Nutrition Information

  • Servings: 4 bowls
  • Calories: 290kcal
  • Fat: 15g
  • Protein: 8g
  • Carbohydrates: 36g
February 6, 2025 0 comments
0 FacebookTwitterPinterestEmail
Newer Posts
Older Posts

Recent Posts

  • Delicious Peanut Butter and Jelly Oatmeal for Kids
  • Nutty Banana Protein Smoothie
  • Savory and Sweet Homemade McGriddle Recipe
  • Keto-Friendly Avocado and Smoked Salmon Breakfast Bowl
  • Deliciously Stuffed French Toast Recipe

Keep in touch

Facebook Twitter Instagram Pinterest Youtube

Popular Recipes

  • 1

    Sweet and Creamy Brown Sugar Vanilla Iced Coffee

    February 6, 2025
  • 2

    Refreshing Whipped Pink Lemonade Recipe

    February 18, 2025
  • 3

    Refreshing Strawberry Tequila Sunrise Recipe

    February 18, 2025
  • 4

    Enchanting Sleeping Beauty Cocktail Recipe

    February 18, 2025
  • 5

    Refreshing Tropical Passion Fruit Smoothie Recipe

    February 18, 2025
  • 6

    Nutty Banana Protein Smoothie

    February 22, 2025

Recent Posts

  • Delicious Peanut Butter and Jelly Oatmeal for Kids

    February 22, 2025
  • Nutty Banana Protein Smoothie

    February 22, 2025
  • Savory and Sweet Homemade McGriddle Recipe

    February 22, 2025

On Pinterest

Categories

  • Breakfast & Brunch (57)
  • Cocktails & Spirits (8)
  • Coffee, Tea & Hot Beverages (12)
  • Desserts & Sweets (61)
  • Dinner (147)
  • Drinks (47)
  • Meat Lovers (95)
  • Non-Alcoholic & Mocktails (17)
  • Quick & Easy (288)
  • Recipes (296)
  • Seafood (27)
  • Smoothies & Shakes (13)
  • Uncategorized (1)
  • Vegan (36)
  • Vegetarians (73)
  • About me
  • Contact Me
  • Privacy Policy
  • Disclaimer
  • Terms of Service
  • Facebook
  • Twitter

@2021 - All Right Reserved. Designed and Developed by PenciDesign


Back To Top
Healthful Plate
  • Home
  • Recipes
    • Vegan
    • Vegetarians
    • Meat Lovers
    • Seafood
    • Desserts & Sweets
    • Breakfast & Brunch
    • Dinner
    • Quick & Easy
  • Drinks
    • Cocktails & Spirits
    • Coffee, Tea & Hot Beverages
    • Non-Alcoholic & Mocktails
    • Smoothies & Shakes
  • Lifestyle
    • Editor’s Pick
    • Kitchen Gadgets