• Home
  • Recipes
    • Vegan
    • Vegetarians
    • Meat Lovers
    • Seafood
    • Desserts & Sweets
    • Breakfast & Brunch
    • Dinner
    • Quick & Easy
  • Drinks
    • Cocktails & Spirits
    • Coffee, Tea & Hot Beverages
    • Non-Alcoholic & Mocktails
    • Smoothies & Shakes
  • Lifestyle
    • Editor’s Pick
    • Kitchen Gadgets
Healthful Plate
keep your memories alive
Quick & EasyRecipesVegetarians

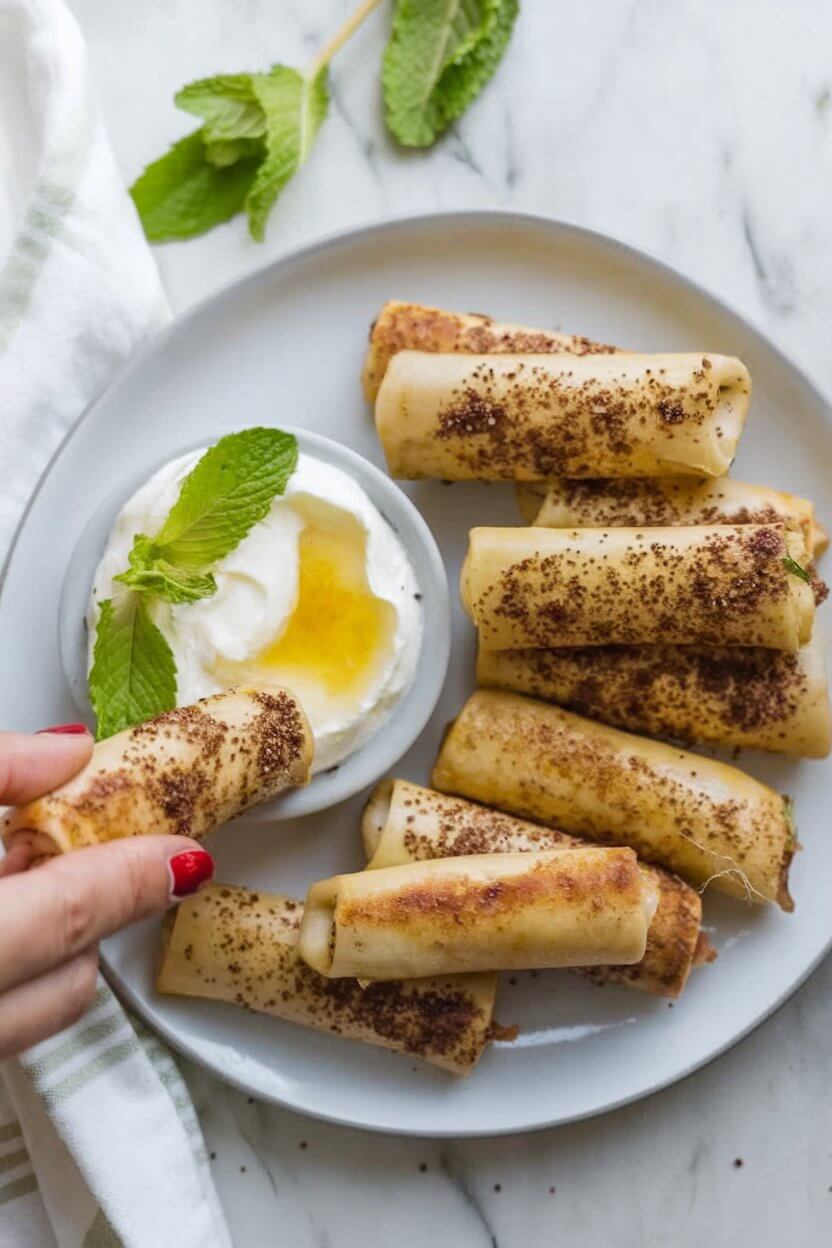
Zaatar and Feta Spring Rolls

by donnyvicky February 20, 2025
written by donnyvicky

If you’re looking for a vibrant and fresh appetizer, these zaatar spring rolls are just what you need. They combine the earthy, aromatic flavors of zaatar with creamy feta cheese, all wrapped up in a delicate rice paper. Perfect for gatherings or a light snack, they bring a taste of the Mediterranean right to your table.

These rolls are not only delicious but also incredibly versatile. You can customize them with your favorite veggies or proteins, making them suitable for vegetarians and meat lovers alike. The crunch of fresh herbs and crispy vegetables adds a delightful texture that pairs beautifully with the savory filling.

Whip up a quick dipping sauce, and you’ve got yourself a delightful treat that’s both sophisticated and easy to make.

Delicious Zaatar Spring Rolls Recipe

These zaatar spring rolls offer a refreshing taste that combines the nutty and herbaceous notes of zaatar with smooth feta cheese. Each bite bursts with flavor, making them an ideal choice for a light meal or appetizer.

The pairing of fresh vegetables and aromatic herbs creates a satisfying crunch, while the rice paper adds a tender touch that wraps everything together beautifully.

Ingredients

  • 8 sheets of rice paper
  • 1 cup fresh mixed herbs (parsley, mint, and cilantro)
  • 1 cup shredded carrots
  • 1 cup cucumber, julienned
  • 1 cup bell peppers, thinly sliced
  • 1 cup crumbled feta cheese
  • 3 tablespoons zaatar spice mix
  • Lemon wedges for serving
  • Dipping sauce (such as tahini or yogurt-based sauce) optional

Instructions

  1. Prepare the Vegetables: Wash and chop all the vegetables and herbs into thin strips.
  2. Mix the Filling: In a bowl, combine the crumbled feta cheese with the zaatar spice mix, adding the prepared vegetables and herbs. Toss gently to combine.
  3. Soak the Rice Paper: Fill a shallow dish with warm water. Dip one rice paper sheet into the water for about 10-15 seconds until it softens. Remove and place it on a clean surface.
  4. Fill the Rolls: Place a small amount of the filling mixture in the center of the rice paper. Fold the sides over the filling, then roll it up tightly from the bottom to the top, ensuring the filling is secure inside.
  5. Repeat: Continue to soak the rice paper and roll until all the filling is used up.
  6. Serve: Arrange the spring rolls on a platter with lemon wedges and your choice of dipping sauce.

Cook and Prep Times

  • Prep Time: 20 minutes
  • Cook Time: 0 minutes
  • Total Time: 20 minutes

Nutrition Information

  • Servings: 4 servings
  • Calories: 150kcal
  • Fat: 9g
  • Protein: 6g
  • Carbohydrates: 12g
February 20, 2025 0 comments
0 FacebookTwitterPinterestEmail
DinnerMeat LoversQuick & EasyRecipes

Spicy and Flavorful Kung Pao Chicken Recipe

by donnyvicky February 20, 2025
written by donnyvicky

Kung Pao Chicken is an iconic dish that brings the vibrant flavors of Chinese cuisine right to your table. This recipe features tender chicken bites tossed in a spicy, savory sauce, making it a perfect choice for a weeknight dinner or a gathering with friends. With a delightful combination of peanuts, bell peppers, and a rich sauce, every bite is a burst of flavor.

If you’re looking to add a little heat to your meal, this stir-fry will do just the trick. It’s not just a dish; it’s a culinary adventure that allows you to explore the bold tastes of Sichuan cuisine. Plus, you can easily adjust the spice level to suit your preference.

This Kung Pao Chicken is not just about heat; it’s about balance. The crunchiness of the peanuts and the freshness of the vegetables complement the tender chicken, creating a harmonious dish that’s sure to impress.

A Classic Kung Pao Chicken Recipe

This Kung Pao Chicken is a stir-fry dish featuring marinated chicken, roasted peanuts, and a mix of colorful vegetables. The sauce is a perfect blend of sweet, sour, and spicy, making it a flavorful addition to your dinner rotation.

Ingredients

  • 1 pound boneless, skinless chicken breasts, diced
  • 3 tablespoons soy sauce
  • 2 tablespoons rice vinegar
  • 1 tablespoon cornstarch
  • 2 tablespoons vegetable oil
  • 1 red bell pepper, diced
  • 1 green bell pepper, diced
  • 1/2 cup unsalted roasted peanuts
  • 3 green onions, chopped
  • 2-3 dried red chilies (adjust to taste)
  • 1 tablespoon ginger, minced
  • 2 cloves garlic, minced
  • 2 tablespoons hoisin sauce
  • 1 tablespoon sesame oil
  • Salt to taste

Instructions

  1. Marinate the Chicken: In a bowl, mix diced chicken with soy sauce, rice vinegar, and cornstarch. Let it sit for at least 15 minutes.
  2. Prep the Sauce: In a small bowl, combine hoisin sauce, sesame oil, and a pinch of salt. Set aside.
  3. Stir-Fry the Chicken: In a large skillet or wok, heat vegetable oil over medium-high heat. Add the marinated chicken and stir-fry until cooked through, about 5-7 minutes.
  4. Add Veggies and Aromatics: Add minced garlic, ginger, bell peppers, and dried chilies to the pan. Stir-fry for another 3-4 minutes until the vegetables are tender but still crisp.
  5. Combine Everything: Pour the prepared sauce over the chicken and vegetables. Add roasted peanuts and green onions, stirring well to coat everything in the sauce. Cook for an additional 2 minutes to heat through.
  6. Serve: Remove from heat and serve hot with steamed rice or noodles.

Cook and Prep Times

  • Prep Time: 15 minutes
  • Cook Time: 15 minutes
  • Total Time: 30 minutes

Nutrition Information

  • Servings: 4 servings
  • Calories: 320kcal
  • Fat: 18g
  • Protein: 25g
  • Carbohydrates: 12g
February 20, 2025 0 comments
0 FacebookTwitterPinterestEmail
Breakfast & BrunchMeat LoversQuick & EasyRecipes

Savory Bagel Breakfast Sliders for a Delightful Morning

by donnyvicky February 20, 2025
written by donnyvicky

Imagine starting your day with a warm, toasty bagel slider filled with savory goodness. These bagel breakfast sliders are the perfect way to elevate your morning routine. Whether you’re rushing to work, hosting a brunch, or simply enjoying a leisurely weekend, these sliders will add a touch of deliciousness to your day.

With layers of crispy bacon, fluffy eggs, and melted cheese, each bite is a delightful combination of flavors and textures. They’re easy to make ahead of time and perfect for sharing, making them an ideal choice for gatherings or meal prep.

Prepare to impress your taste buds and those of your family or friends with these delightful breakfast sliders that pack a punch of flavor in every bite.

Simple and Tasty Bagel Breakfast Sliders

These bagel breakfast sliders are a hearty and satisfying meal that features toasted bagels, scrambled eggs, savory bacon, and gooey cheese. They’re perfect for busy mornings or special occasions, and their delicious combination of flavors will keep you coming back for more.

Ingredients

  • 8 bagels, halved
  • 8 large eggs
  • 8 slices of cooked bacon
  • 1 cup shredded cheddar cheese
  • Salt and pepper to taste
  • Butter for greasing
  • Fresh herbs for garnish (optional)

Instructions

  1. Preheat the Oven: Preheat your oven to 350°F (175°C).
  2. Prepare the Bagels: Grease a baking dish with butter and place the bottom halves of the bagels in the dish.
  3. Cook the Bacon: Cook the bacon in a skillet until crispy. Remove and drain on paper towels.
  4. Scramble the Eggs: In a bowl, whisk the eggs with salt and pepper. In the same skillet, scramble the eggs until just set. Remove from heat.
  5. Assemble the Sliders: On each bagel half, layer scrambled eggs, a slice of bacon, and a sprinkle of cheddar cheese. Top with the other half of the bagel.
  6. Bake: Place the assembled sliders in the oven for 10-15 minutes or until the cheese is melted and the bagels are toasted.
  7. Serve: Remove from the oven, garnish with fresh herbs if desired, and serve warm.

Cook and Prep Times

  • Prep Time: 10 minutes
  • Cook Time: 15 minutes
  • Total Time: 25 minutes

Nutrition Information

  • Servings: 8 sliders
  • Calories: 300kcal
  • Fat: 15g
  • Protein: 18g
  • Carbohydrates: 30g
February 20, 2025 0 comments
0 FacebookTwitterPinterestEmail
Desserts & SweetsDinnerMeat LoversQuick & EasyRecipes

Savory Bacon and Cheese Quiche

by donnyvicky February 20, 2025
written by donnyvicky

If you’re looking for a dish that’s both hearty and comforting, look no further than this bacon and cheese quiche. It’s the perfect way to start your day with a delicious breakfast or brunch that will leave you and your guests satisfied. Easy to prepare and packed with flavor, this quiche is sure to become a favorite in your household.

Imagine a flaky, buttery crust filled with crispy bacon, melty cheese, and a rich egg custard. Each bite is a delightful combination of textures and flavors that blend seamlessly together. This quiche is versatile too—feel free to throw in some fresh herbs or veggies for an extra twist!

Delicious Bacon and Cheese Quiche Recipe

This bacon and cheese quiche features a crisp, golden crust enveloping a creamy filling of eggs, cheese, and savory bacon. It’s a dish that’s both filling and flavorful, making it perfect for any meal of the day.

Ingredients

  • 1 pre-made pie crust
  • 6 slices of bacon, cooked and crumbled
  • 1 cup shredded cheddar cheese
  • 1/2 cup milk
  • 4 large eggs
  • 1/4 teaspoon salt
  • 1/4 teaspoon black pepper
  • 1/2 teaspoon garlic powder
  • 1/2 teaspoon onion powder
  • Fresh parsley for garnish (optional)

Instructions

  1. Preheat the Oven: Preheat your oven to 375°F (190°C).
  2. Prepare the Crust: Place the pie crust in a pie dish and prick the bottom with a fork. Pre-bake for about 10 minutes until lightly golden.
  3. Cook the Bacon: In a skillet, cook the bacon until crispy. Drain on paper towels and crumble when cool.
  4. Mix the Filling: In a mixing bowl, whisk together the eggs, milk, salt, pepper, garlic powder, and onion powder until well combined.
  5. Assemble the Quiche: Sprinkle the crumbled bacon and shredded cheese evenly over the pre-baked crust. Pour the egg mixture over the top.
  6. Bake: Bake for 30-35 minutes or until the quiche is set and golden on top. The center should be firm and not jiggly.
  7. Serve: Allow to cool for a few minutes before slicing. Garnish with fresh parsley if desired, and enjoy warm.

Cook and Prep Times

  • Prep Time: 15 minutes
  • Cook Time: 35 minutes
  • Total Time: 50 minutes

Nutrition Information

  • Servings: 8 slices
  • Calories: 250kcal
  • Fat: 18g
  • Protein: 10g
  • Carbohydrates: 15g
February 20, 2025 0 comments
0 FacebookTwitterPinterestEmail
Desserts & SweetsQuick & EasyRecipes

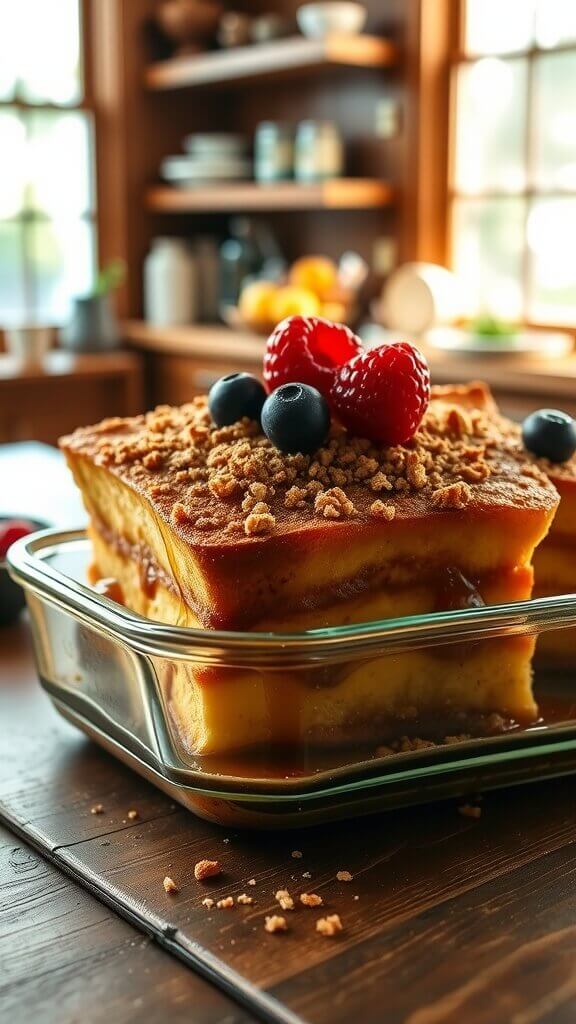
Decadent Overnight French Toast Casserole

by donnyvicky February 20, 2025
written by donnyvicky

Imagine waking up to the aroma of sweet, cinnamon-infused bread wafting through your home. This French toast casserole is the perfect way to kickstart your morning or impress guests during brunch. It’s a simple, make-ahead dish that transforms ordinary bread into a luxurious breakfast option.

With layers of fluffy bread soaked in a creamy egg mixture and topped with a crunchy streusel, this casserole is not just a meal; it’s an experience. The combination of warm maple syrup and fresh berries adds a delightful touch that elevates this dish to another level.

Whether you’re serving it for a holiday breakfast or a weekend treat, this French toast casserole is sure to bring smiles to the table. It’s easy to customize with your favorite toppings, making it a versatile choice for any occasion.

The Ultimate French Toast Casserole Recipe

This delightful French toast casserole features thick slices of bread soaked overnight in a rich mixture of eggs, milk, and vanilla. It’s baked to perfection, producing a soft and custardy interior with a crisp topping that balances the flavors beautifully.

Ingredients

  • 1 loaf of thick bread (such as challah or brioche), cut into cubes
  • 6 large eggs
  • 2 cups milk
  • 1/2 cup heavy cream
  • 1/2 cup sugar
  • 1 tablespoon vanilla extract
  • 1 teaspoon ground cinnamon
  • 1/4 teaspoon salt
  • 1/2 cup butter, melted
  • 1 cup brown sugar
  • 1 cup chopped pecans or walnuts (optional)
  • Maple syrup and fresh berries for serving

Instructions

  1. Prepare the Bread: In a large bowl, combine the bread cubes and set aside.
  2. Make the Egg Mixture: In another bowl, whisk together the eggs, milk, cream, sugar, vanilla, cinnamon, and salt until well combined.
  3. Combine: Pour the egg mixture over the bread cubes, ensuring they are evenly coated. Gently fold in the melted butter and nuts, if using.
  4. Refrigerate: Cover the mixture with plastic wrap and refrigerate overnight to allow the bread to absorb the liquid.
  5. Bake: Preheat the oven to 350°F (175°C). Remove the casserole from the refrigerator and uncover. In a separate bowl, mix brown sugar and a bit of cinnamon, then sprinkle it over the top of the casserole.
  6. Cook for 45-50 minutes or until the top is golden brown and the custard is set.
  7. Serve: Allow to cool slightly before slicing. Serve warm with maple syrup and fresh berries on the side.

Cook and Prep Times

  • Prep Time: 15 minutes
  • Cook Time: 50 minutes
  • Total Time: 1 hour 5 minutes (plus overnight chilling)

Nutrition Information

  • Servings: 8 servings
  • Calories: 400kcal
  • Fat: 20g
  • Protein: 8g
  • Carbohydrates: 50g
February 20, 2025 0 comments
0 FacebookTwitterPinterestEmail
DinnerMeat LoversQuick & EasyRecipes

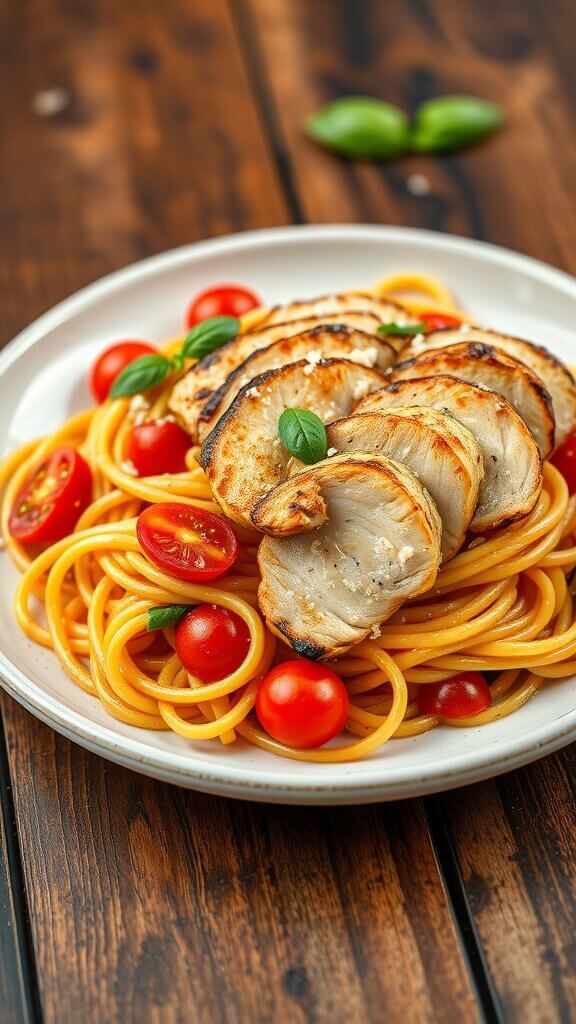
Tomato Basil Pasta with Balsamic Grilled Chicken

by donnyvicky February 20, 2025
written by donnyvicky

Looking for a dish that combines simplicity with vibrant flavors? This Tomato Basil Pasta with Balsamic Grilled Chicken is the answer. It’s perfect for a weeknight dinner or a special occasion, bringing together fresh ingredients that create a delightful experience in every bite.

Imagine twirling al dente pasta around a fork, topped with juicy grilled chicken drizzled in a balsamic reduction. The sweetness of ripe tomatoes and the aromatic basil create a burst of flavor that is both comforting and refreshing. This dish is not only visually appealing but also a feast for the taste buds.

Whether you’re cooking for family or hosting friends, this recipe is sure to impress. With minimal prep time and a symphony of flavors, you’ll find yourself making this dish time and again.

A Flavorful Tomato Basil Pasta Dish

This dish features spaghetti tossed with fresh tomatoes, fragrant basil, and succulent balsamic grilled chicken. The pasta is lightly coated in olive oil, allowing the natural flavors to shine through. Each mouthful delivers a harmonious balance of sweetness and acidity, making it an irresistible option for pasta lovers.

Ingredients

  • 8 ounces spaghetti
  • 2 cups cherry tomatoes, halved
  • 2 tablespoons olive oil
  • 1/4 cup fresh basil, chopped
  • Salt and pepper to taste
  • 2 chicken breasts, boneless and skinless
  • 1/4 cup balsamic vinegar
  • 2 tablespoons honey
  • Parmesan cheese for serving (optional)

Instructions

  1. Cook the Pasta: In a large pot of salted boiling water, cook the spaghetti according to package instructions until al dente. Drain and set aside.
  2. Prepare the Chicken: In a small bowl, whisk together balsamic vinegar and honey. Marinate the chicken breasts in the mixture for at least 30 minutes.
  3. Grill the Chicken: Preheat the grill over medium-high heat. Remove the chicken from the marinade and grill for 6-7 minutes on each side, or until cooked through. Let rest before slicing.
  4. Toss the Pasta: In a large bowl, combine the cooked spaghetti, cherry tomatoes, olive oil, basil, salt, and pepper. Toss until well combined.
  5. Serve: Plate the pasta and top with sliced balsamic grilled chicken. Sprinkle with Parmesan cheese if desired, and enjoy!

Cook and Prep Times

  • Prep Time: 15 minutes
  • Cook Time: 20 minutes
  • Total Time: 35 minutes

Nutrition Information

  • Servings: 4 servings
  • Calories: 450kcal
  • Fat: 10g
  • Protein: 30g
  • Carbohydrates: 60g
February 20, 2025 0 comments
0 FacebookTwitterPinterestEmail
DinnerMeat LoversRecipes

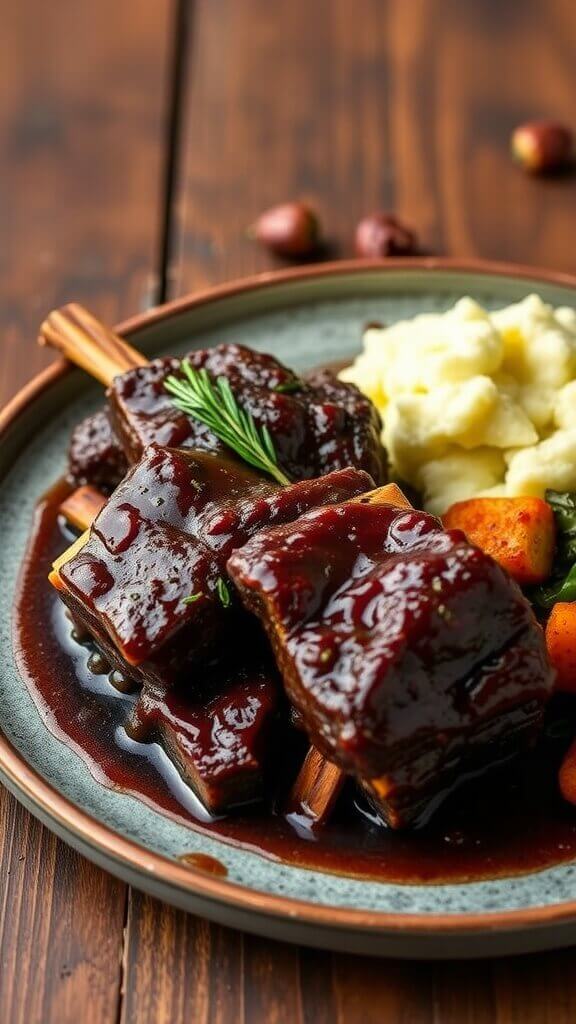
Succulent Red Wine Braised Beef Short Ribs Recipe

by donnyvicky February 20, 2025
written by donnyvicky

Imagine coming home to the rich aroma of tender beef short ribs slow-cooked in a luxurious red wine sauce. This dish is not just a meal; it’s an experience that will tantalize your taste buds and warm your soul. Every bite is a celebration of flavors that will leave you wanting more.

This recipe is ideal for special occasions or a comforting family dinner. Whether you’re a seasoned home cook or just starting out, the steps are straightforward and the outcome is undeniably rewarding. Expect a dish that’s both hearty and sophisticated, perfect for impressing your guests.

Hearty Red Wine Braised Beef Short Ribs

These beef short ribs are braised until incredibly tender, infused with the deep, robust flavors of red wine, garlic, and fresh herbs. The sauce is rich and savory, making it the perfect complement to creamy mashed potatoes or crusty bread.

The taste is a harmonious blend of savory and slightly sweet, with a melt-in-your-mouth texture that pairs beautifully with the earthy notes from the red wine and aromatic vegetables.

Ingredients

  • 4 pounds beef short ribs
  • 2 tablespoons olive oil
  • 1 large onion, chopped
  • 2 carrots, chopped
  • 2 celery stalks, chopped
  • 4 cloves garlic, minced
  • 2 cups red wine
  • 2 cups beef broth
  • 2 tablespoons tomato paste
  • 2 sprigs fresh thyme
  • 2 sprigs fresh rosemary
  • Salt and pepper to taste

Instructions

  1. Preheat your oven to 325°F (163°C).
  2. Season the short ribs generously with salt and pepper. In a large Dutch oven, heat olive oil over medium-high heat. Sear the short ribs on all sides until browned, about 3-4 minutes per side. Remove and set aside.
  3. In the same pot, add chopped onion, carrots, and celery. Sauté until softened, about 5 minutes. Stir in minced garlic and cook for another minute until fragrant.
  4. Deglaze the pot with red wine, scraping up any browned bits from the bottom. Bring to a simmer and let it reduce by half, about 10-15 minutes.
  5. Add the beef broth, tomato paste, thyme, and rosemary to the pot. Return the short ribs to the Dutch oven, ensuring they are submerged in the liquid.
  6. Cover with a lid and transfer to the oven. Braise for about 2.5 to 3 hours, or until the meat is fork-tender.
  7. Remove from the oven and let the short ribs rest for a few minutes before serving. Serve with the sauce spooned over the top.

Cook and Prep Times

  • Prep Time: 20 minutes
  • Cook Time: 2.5 to 3 hours
  • Total Time: 3 hours 20 minutes

Nutrition Information

  • Servings: 6 servings
  • Calories: 450kcal
  • Fat: 30g
  • Protein: 35g
  • Carbohydrates: 8g
February 20, 2025 0 comments
0 FacebookTwitterPinterestEmail
Desserts & SweetsQuick & EasyRecipes

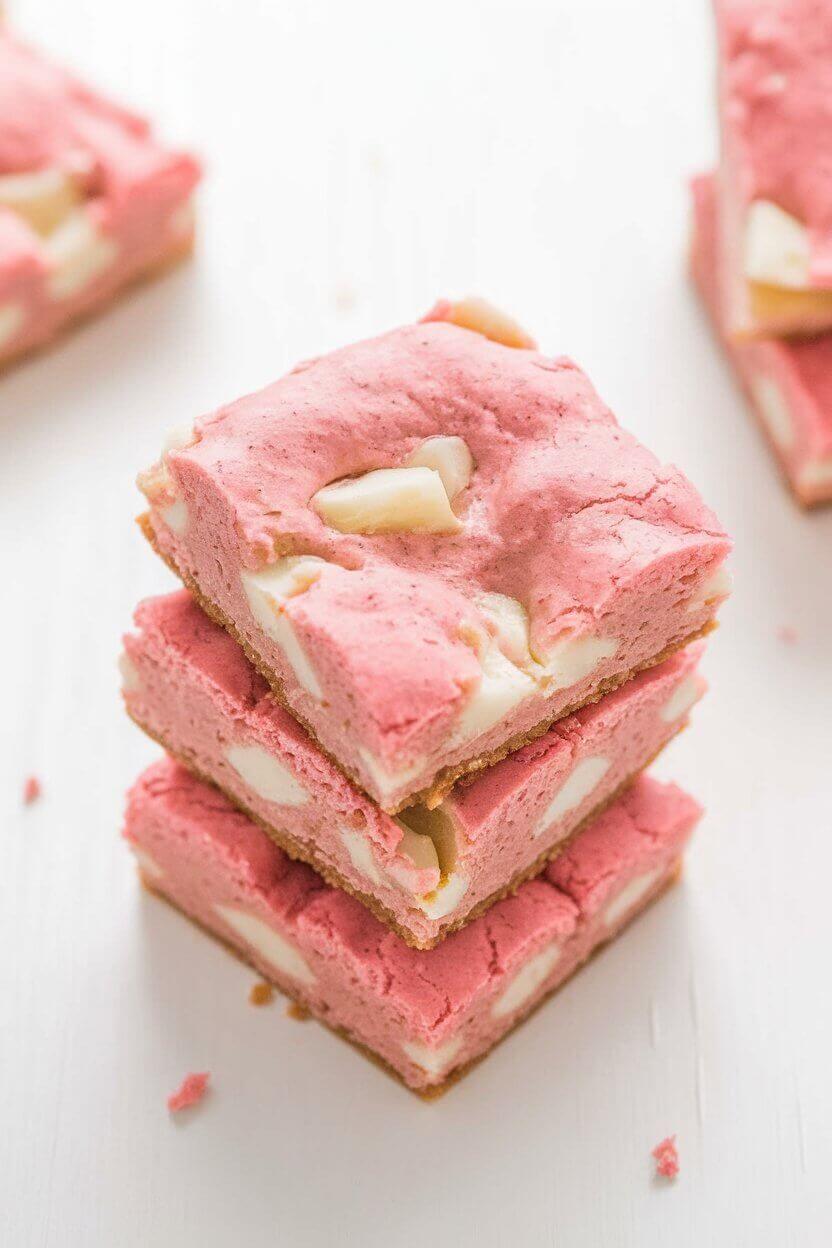
Decadent Strawberry White Chocolate Gooey Bars

by donnyvicky February 20, 2025
written by donnyvicky

If you’re looking for a dessert that perfectly combines sweet strawberries and creamy white chocolate, these gooey bars are a delightful choice. They create a blissful treat that’s both fruity and indulgent, making them ideal for any occasion. Each bite provides a burst of strawberry flavor paired with a silky smooth white chocolate filling.

Imagine sitting down with a warm, gooey bar fresh from the oven, the aroma of strawberries wafting through the air. These bars are not just desserts; they are an experience that will have your taste buds dancing. Perfect for sharing with friends or savoring alone, they truly capture the essence of summer in every bite.

The creamy texture of the white chocolate complements the tartness of the strawberries beautifully. Plus, the simplicity of the recipe means you can whip them up quickly, making them a go-to for unexpected guests or a craving that strikes at any time.

Strawberry White Chocolate Gooey Bars Recipe

These strawberry white chocolate gooey bars are rich and luscious, featuring a buttery base topped with fresh strawberries and a creamy white chocolate layer. They are chewy, sweet, and utterly satisfying, perfect for anyone who loves a combination of flavors.

Ingredients

  • 1 cup unsalted butter, melted
  • 1 cup brown sugar, packed
  • 1/2 cup granulated sugar
  • 2 large eggs
  • 2 teaspoons vanilla extract
  • 2 cups all-purpose flour
  • 1 teaspoon baking powder
  • 1/2 teaspoon salt
  • 1 cup white chocolate chips
  • 1 cup fresh strawberries, hulled and chopped

Instructions

  1. Preheat the Oven: Preheat your oven to 350°F (175°C). Grease a 9×13 inch baking dish or line it with parchment paper.
  2. Mix the Wet Ingredients: In a large bowl, combine melted butter, brown sugar, and granulated sugar. Mix well until smooth. Add the eggs and vanilla extract, stirring until fully incorporated.
  3. Combine the Dry Ingredients: In another bowl, whisk together flour, baking powder, and salt. Gradually add the dry ingredients to the wet mixture, stirring until just combined.
  4. Fold in the Chocolate and Strawberries: Gently fold in the white chocolate chips and chopped strawberries until evenly distributed throughout the batter.
  5. Bake: Pour the batter into the prepared baking dish, spreading it evenly. Bake for 25-30 minutes or until the edges are golden brown and a toothpick inserted in the center comes out with a few moist crumbs.
  6. Cool and Serve: Allow the bars to cool in the pan for about 15 minutes before slicing into squares. For the best texture, enjoy them warm or at room temperature.

Cook and Prep Times

  • Prep Time: 15 minutes
  • Cook Time: 30 minutes
  • Total Time: 45 minutes

Nutrition Information

  • Servings: 12 bars
  • Calories: 250kcal
  • Fat: 12g
  • Protein: 3g
  • Carbohydrates: 35g
February 20, 2025 0 comments
0 FacebookTwitterPinterestEmail
DinnerMeat LoversQuick & EasyRecipes

Crispy Parmesan Crusted Chicken Recipe

by donnyvicky February 20, 2025
written by donnyvicky

If you’re looking for a dish that delivers both crunch and flavor, this crispy Parmesan crusted chicken is just what you need. Not only is it easy to prepare, but it’s also a surefire way to impress your family or guests with a beautiful presentation and delicious taste. The combination of golden-brown crust and tender chicken will have everyone coming back for more.

Imagine the satisfying crunch of the Parmesan coating with each bite, perfectly complementing the juicy chicken underneath. This dish is versatile and can be paired with a variety of sides, whether you prefer a fresh salad, roasted vegetables, or creamy mashed potatoes.

This recipe is not only about great taste but also about simplicity. With a handful of ingredients and a quick preparation time, you can create a delightful meal any night of the week.

Delicious Parmesan Crusted Chicken

This dish features chicken breasts coated in a crispy mixture of breadcrumbs and Parmesan cheese, baked to golden perfection. It’s a perfect blend of savory flavors with a satisfying crunch and a moist interior.

Ingredients

  • 4 boneless, skinless chicken breasts
  • 1 cup breadcrumbs (panko works best)
  • 1/2 cup grated Parmesan cheese
  • 1 teaspoon garlic powder
  • 1 teaspoon onion powder
  • 1 teaspoon Italian seasoning
  • Salt and pepper to taste
  • 2 large eggs, beaten
  • 2 tablespoons olive oil
  • Fresh parsley for garnish (optional)

Instructions

  1. Preheat the Oven: Preheat your oven to 400°F (200°C) and lightly grease a baking sheet or line it with parchment paper.
  2. Prepare the Coating: In a shallow bowl, mix the breadcrumbs, Parmesan cheese, garlic powder, onion powder, Italian seasoning, salt, and pepper until well combined.
  3. Coat the Chicken: Dip each chicken breast into the beaten eggs, letting the excess drip off, then press into the breadcrumb mixture, coating both sides thoroughly.
  4. Bake the Chicken: Place the coated chicken breasts on the prepared baking sheet. Drizzle with olive oil, then bake in the preheated oven for 25-30 minutes or until the chicken is cooked through and the crust is golden brown.
  5. Serve: Once done, remove from the oven and let it rest for a few minutes. Garnish with fresh parsley if desired, then serve with your favorite sides.

Cook and Prep Times

  • Prep Time: 15 minutes
  • Cook Time: 30 minutes
  • Total Time: 45 minutes

Nutrition Information

  • Servings: 4 servings
  • Calories: 320kcal
  • Fat: 15g
  • Protein: 30g
  • Carbohydrates: 10g
February 20, 2025 0 comments
0 FacebookTwitterPinterestEmail
DinnerQuick & EasyRecipes

Savory Crockpot Cheesy Potato Casserole

by donnyvicky February 20, 2025
written by donnyvicky

Imagine coming home to a warm, comforting aroma wafting through your house, only to discover a delicious cheesy potato casserole waiting for you. This crockpot recipe is the ultimate solution for busy days when you still want to serve something hearty and satisfying. It’s perfect for family gatherings, potlucks, or simply treating yourself to a delightful dish that pairs well with almost any main course.

This savory casserole is not only easy to prepare, but it also lets the flavors meld together beautifully as it cooks low and slow. You’ll savor the richness of melted cheese combined with tender potatoes, making every bite a scrumptious experience. And the best part? You can customize it to your taste, adding in extras like crispy bacon or fresh herbs to elevate the dish.

Delicious Crockpot Cheesy Potato Casserole Recipe

This cheesy potato casserole is a creamy, indulgent dish made with layers of thinly sliced potatoes, rich cheese, and a savory sauce, all cooked to perfection in your crockpot. It’s a deliciously cheesy side that complements any meal and is sure to please your taste buds.

Ingredients

  • 4 large russet potatoes, peeled and thinly sliced
  • 2 cups shredded cheddar cheese
  • 1 cup sour cream
  • 1 cup cream of chicken soup
  • 1/2 cup milk
  • 1/2 teaspoon garlic powder
  • 1/2 teaspoon onion powder
  • Salt and pepper to taste
  • 2 tablespoons chopped fresh parsley for garnish (optional)
  • 1 cup cooked bacon bits (optional)

Instructions

  1. Prepare the Potatoes: Peel the potatoes and slice them thinly using a mandoline or sharp knife.
  2. Mix the Sauce: In a large bowl, combine the sour cream, cream of chicken soup, milk, garlic powder, onion powder, salt, and pepper.
  3. Layer the Ingredients: In the crockpot, layer half of the sliced potatoes, followed by half of the cheese and half of the sauce mixture. Repeat the layers with the remaining ingredients, finishing with the cheese on top.
  4. Cook: Cover and cook on low for 6-8 hours or on high for 3-4 hours, until the potatoes are tender and the cheese is bubbly.
  5. Serve: Once cooked, stir gently to combine, garnish with chopped parsley if desired, and serve warm.

Cook and Prep Times

  • Prep Time: 15 minutes
  • Cook Time: 6-8 hours
  • Total Time: 6 hours 15 minutes

Nutrition Information

  • Servings: 8 servings
  • Calories: 320kcal
  • Fat: 18g
  • Protein: 10g
  • Carbohydrates: 36g
February 20, 2025 0 comments
0 FacebookTwitterPinterestEmail
Newer Posts
Older Posts

Recent Posts

  • Delicious Peanut Butter and Jelly Oatmeal for Kids
  • Nutty Banana Protein Smoothie
  • Savory and Sweet Homemade McGriddle Recipe
  • Keto-Friendly Avocado and Smoked Salmon Breakfast Bowl
  • Deliciously Stuffed French Toast Recipe

Keep in touch

Facebook Twitter Instagram Pinterest Youtube

Popular Recipes

  • 1

    Sweet and Creamy Brown Sugar Vanilla Iced Coffee

    February 6, 2025
  • 2

    Refreshing Whipped Pink Lemonade Recipe

    February 18, 2025
  • 3

    Refreshing Strawberry Tequila Sunrise Recipe

    February 18, 2025
  • 4

    Refreshing Tropical Passion Fruit Smoothie Recipe

    February 18, 2025
  • 5

    Enchanting Sleeping Beauty Cocktail Recipe

    February 18, 2025
  • 6

    Nutty Banana Protein Smoothie

    February 22, 2025

Recent Posts

  • Delicious Peanut Butter and Jelly Oatmeal for Kids

    February 22, 2025
  • Nutty Banana Protein Smoothie

    February 22, 2025
  • Savory and Sweet Homemade McGriddle Recipe

    February 22, 2025

On Pinterest

Categories

  • Breakfast & Brunch (57)
  • Cocktails & Spirits (8)
  • Coffee, Tea & Hot Beverages (12)
  • Desserts & Sweets (61)
  • Dinner (147)
  • Drinks (47)
  • Meat Lovers (95)
  • Non-Alcoholic & Mocktails (17)
  • Quick & Easy (288)
  • Recipes (296)
  • Seafood (27)
  • Smoothies & Shakes (13)
  • Uncategorized (1)
  • Vegan (36)
  • Vegetarians (73)
  • About me
  • Contact Me
  • Privacy Policy
  • Disclaimer
  • Terms of Service
  • Facebook
  • Twitter

@2021 - All Right Reserved. Designed and Developed by PenciDesign


Back To Top
Healthful Plate
  • Home
  • Recipes
    • Vegan
    • Vegetarians
    • Meat Lovers
    • Seafood
    • Desserts & Sweets
    • Breakfast & Brunch
    • Dinner
    • Quick & Easy
  • Drinks
    • Cocktails & Spirits
    • Coffee, Tea & Hot Beverages
    • Non-Alcoholic & Mocktails
    • Smoothies & Shakes
  • Lifestyle
    • Editor’s Pick
    • Kitchen Gadgets