• Home
  • Recipes
    • Vegan
    • Vegetarians
    • Meat Lovers
    • Seafood
    • Desserts & Sweets
    • Breakfast & Brunch
    • Dinner
    • Quick & Easy
  • Drinks
    • Cocktails & Spirits
    • Coffee, Tea & Hot Beverages
    • Non-Alcoholic & Mocktails
    • Smoothies & Shakes
  • Lifestyle
    • Editor’s Pick
    • Kitchen Gadgets
Healthful Plate
keep your memories alive
DinnerMeat LoversQuick & EasyRecipes

Creamy Ranch Chicken Skillet Recipe

by donnyvicky February 18, 2025
written by donnyvicky

Looking for a dish that combines creamy texture with bold ranch flavor? This creamy ranch chicken skillet is just what you need. It’s a simple yet satisfying meal that can be whipped up in no time, making it perfect for busy weeknights when you still want a home-cooked meal.

This recipe is incredibly versatile. You can serve it over rice, pasta, or even with a side of roasted vegetables. The creamy, tangy ranch sauce clings to the chicken beautifully, providing a burst of flavor in every bite.

Imagine succulent chicken breasts seared to perfection, then smothered in a rich ranch-flavored sauce that makes the dish feel indulgent without being overly complicated. It’s comfort food at its finest.

Delicious Creamy Ranch Chicken in a Skillet

This creamy ranch chicken features juicy chicken breasts cooked in a luscious ranch sauce, made with cream and seasoning. It’s savory, tangy, and bursting with flavor, ready in about 30 minutes.

Ingredients

  • 4 boneless, skinless chicken breasts
  • 1 tablespoon olive oil
  • 1 cup heavy cream
  • 1 packet ranch seasoning mix
  • 1 cup shredded cheddar cheese
  • Salt and pepper to taste
  • Chopped fresh parsley for garnish (optional)

Instructions

  1. Sear the Chicken: In a large skillet, heat olive oil over medium-high heat. Season the chicken breasts with salt and pepper and add them to the skillet. Cook for 5-7 minutes on each side until they are golden and cooked through. Remove the chicken from the skillet and set aside.
  2. Make the Ranch Sauce: In the same skillet, lower the heat and pour in the heavy cream. Add the ranch seasoning mix and stir until well combined. Allow it to simmer for a few minutes until it thickens slightly.
  3. Combine: Return the cooked chicken to the skillet, coating it in the creamy ranch sauce. Sprinkle the shredded cheddar cheese on top and let it melt.
  4. Serve: Plate the chicken, drizzle with extra sauce from the skillet, and garnish with chopped parsley if desired.

Cook and Prep Times

  • Prep Time: 10 minutes
  • Cook Time: 20 minutes
  • Total Time: 30 minutes

Nutrition Information

  • Servings: 4 servings
  • Calories: 450kcal
  • Fat: 28g
  • Protein: 36g
  • Carbohydrates: 5g
February 18, 2025 0 comments
0 FacebookTwitterPinterestEmail
Breakfast & BrunchQuick & EasyRecipes

Decadent Chocolate Peanut Butter Meltaways

by donnyvicky February 15, 2025
written by donnyvicky

Looking for a sweet treat that combines the rich flavors of chocolate and peanut butter? These meltaways are the perfect indulgence! They simply melt in your mouth, offering a delightful balance of creamy peanut butter and luscious chocolate. Ideal for satisfying your sweet tooth or impressing guests at your next gathering.

These meltaways are incredibly easy to make, requiring just a few simple ingredients. You’ll be amazed at how quickly you can whip up a batch. Whether you’re a seasoned baker or just starting out, this recipe is a fun way to enjoy a classic flavor combination.

The best part about these treats is their versatility. You can customize them with your favorite toppings or mix-ins to make them truly your own. From crushed nuts to sea salt, the possibilities are endless!

Easy Chocolate Peanut Butter Meltaways Recipe

These meltaways are rich, creamy, and satisfyingly sweet, with a perfect combination of chocolate and peanut butter. The creamy texture paired with the velvety chocolate coating makes for a heavenly treat that’s hard to resist.

Expect an irresistible sweetness with a hint of saltiness from the peanut butter, creating a balance that will have you reaching for more.

Ingredients

  • 1 cup creamy peanut butter
  • 1/2 cup powdered sugar
  • 1/4 cup unsalted butter, softened
  • 1 teaspoon vanilla extract
  • 2 cups semi-sweet chocolate chips
  • 1 tablespoon coconut oil (or shortening, optional)
  • Sea salt for garnish (optional)

Instructions

  1. Prepare the Filling: In a mixing bowl, combine the peanut butter, powdered sugar, softened butter, and vanilla extract. Mix until smooth and well combined.
  2. Shape the Mixture: Scoop out small portions of the peanut butter mixture and roll them into balls. Place them on a baking sheet lined with parchment paper and flatten slightly. Freeze for about 30 minutes until firm.
  3. Melt the Chocolate: In a microwave-safe bowl, combine the chocolate chips and coconut oil. Microwave in 30-second intervals, stirring in between, until fully melted and smooth.
  4. Coat the Meltaways: Dip each frozen peanut butter ball into the melted chocolate, making sure they are fully coated. Return them to the parchment-lined baking sheet.
  5. Chill and Garnish: Once all the meltaways are coated, place them back in the refrigerator to set. If desired, sprinkle a pinch of sea salt on top before the chocolate hardens.
  6. Serve: Once the chocolate has fully set, enjoy your meltaways! Store any leftovers in an airtight container in the refrigerator.

Cook and Prep Times

  • Prep Time: 15 minutes
  • Freeze Time: 30 minutes
  • Total Time: 45 minutes

Nutrition Information

  • Servings: 24 meltaways
  • Calories: 120kcal
  • Fat: 8g
  • Protein: 3g
  • Carbohydrates: 9g
February 15, 2025 0 comments
0 FacebookTwitterPinterestEmail
Breakfast & BrunchDesserts & SweetsQuick & EasyRecipes

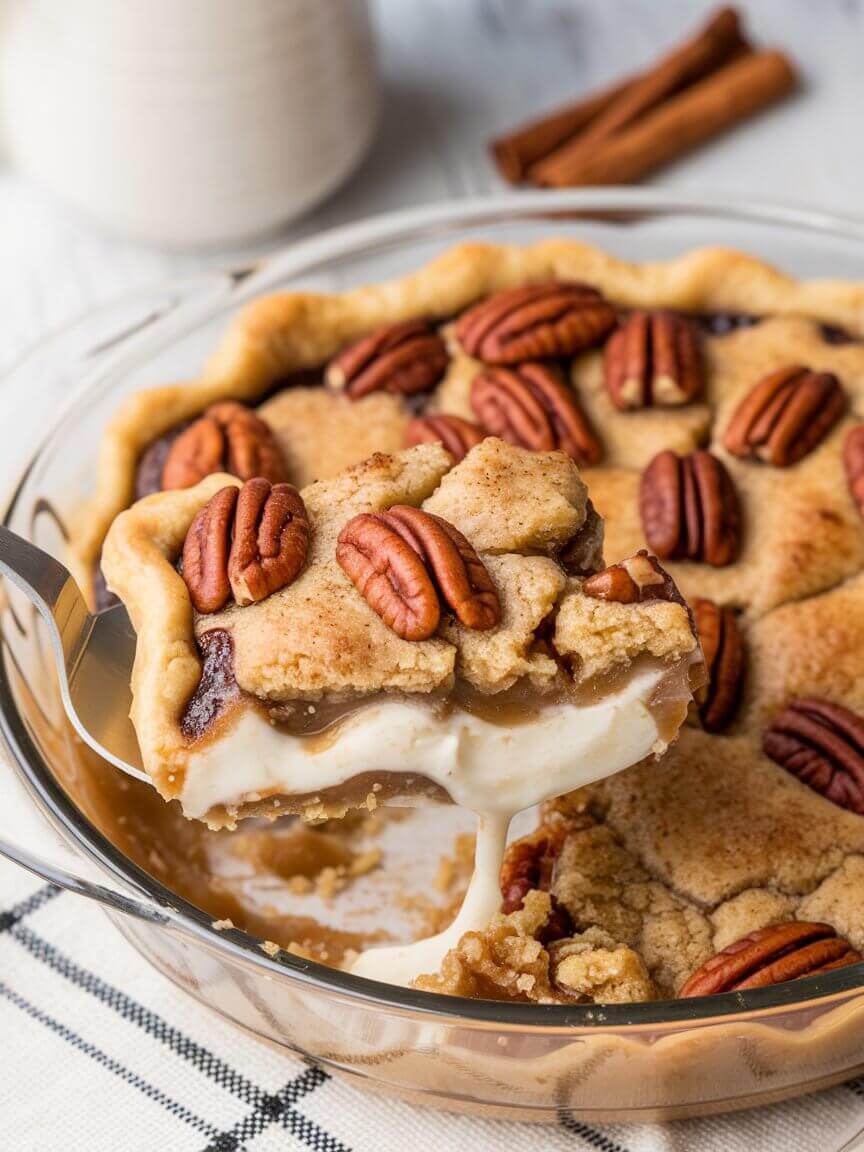
Delicious Pecan Pie Dump Cake Recipe

by donnyvicky February 15, 2025
written by donnyvicky

Craving a dessert that’s both effortless and indulgent? This Pecan Pie Dump Cake is the answer. It’s a delightful combination of rich pecans and a buttery cake mix, making it a perfect treat for any occasion. Whether you’re hosting a gathering or just want a sweet bite at home, this recipe is sure to impress.

Imagine a warm, gooey dessert that captures the essence of a traditional pecan pie, but with half the work. With just a few simple ingredients, you can create a decadent cake that oozes flavor and comfort. Perfect when served warm with a scoop of vanilla ice cream on top!

This recipe is perfect for bakers of all skill levels. Just layer the ingredients, pop it in the oven, and let the magic happen. You’ll love how easy and satisfying this dessert is.

Effortless and Tasty Pecan Pie Dump Cake

This Pecan Pie Dump Cake is a sweet, rich dessert that balances the nuttiness of pecans with a buttery cake base. It’s gooey, crunchy, and incredibly satisfying, making it a must-try for any dessert lover.

Ingredients

  • 1 box of yellow cake mix
  • 1 cup chopped pecans
  • 1/2 cup melted butter
  • 1 cup brown sugar
  • 1 cup corn syrup
  • 4 large eggs
  • 1 teaspoon vanilla extract
  • 1/2 teaspoon salt

Instructions

  1. Preheat the Oven: Preheat your oven to 350°F (175°C).
  2. Prepare the Baking Dish: Grease a 9×13 inch baking dish.
  3. Mix the Filling: In a large bowl, combine the brown sugar, corn syrup, eggs, melted butter, vanilla extract, and salt. Mix well until combined.
  4. Add Pecans: Stir in the chopped pecans into the filling mixture.
  5. Layer the Cake Mix: Pour the filling mixture into the prepared baking dish. Then, evenly sprinkle the dry yellow cake mix over the top of the filling. Do not stir.
  6. Bake: Drizzle melted butter over the cake mix layer. Bake in the preheated oven for 45-50 minutes, or until the top is golden brown and set.
  7. Cool and Serve: Allow to cool slightly before serving. Enjoy warm, topped with whipped cream or vanilla ice cream.

Cook and Prep Times

  • Prep Time: 15 minutes
  • Cook Time: 50 minutes
  • Total Time: 1 hour 5 minutes

Nutrition Information

  • Servings: 12
  • Calories: 320kcal
  • Fat: 18g
  • Protein: 4g
  • Carbohydrates: 40g
February 15, 2025 0 comments
0 FacebookTwitterPinterestEmail
Breakfast & BrunchQuick & EasyRecipes

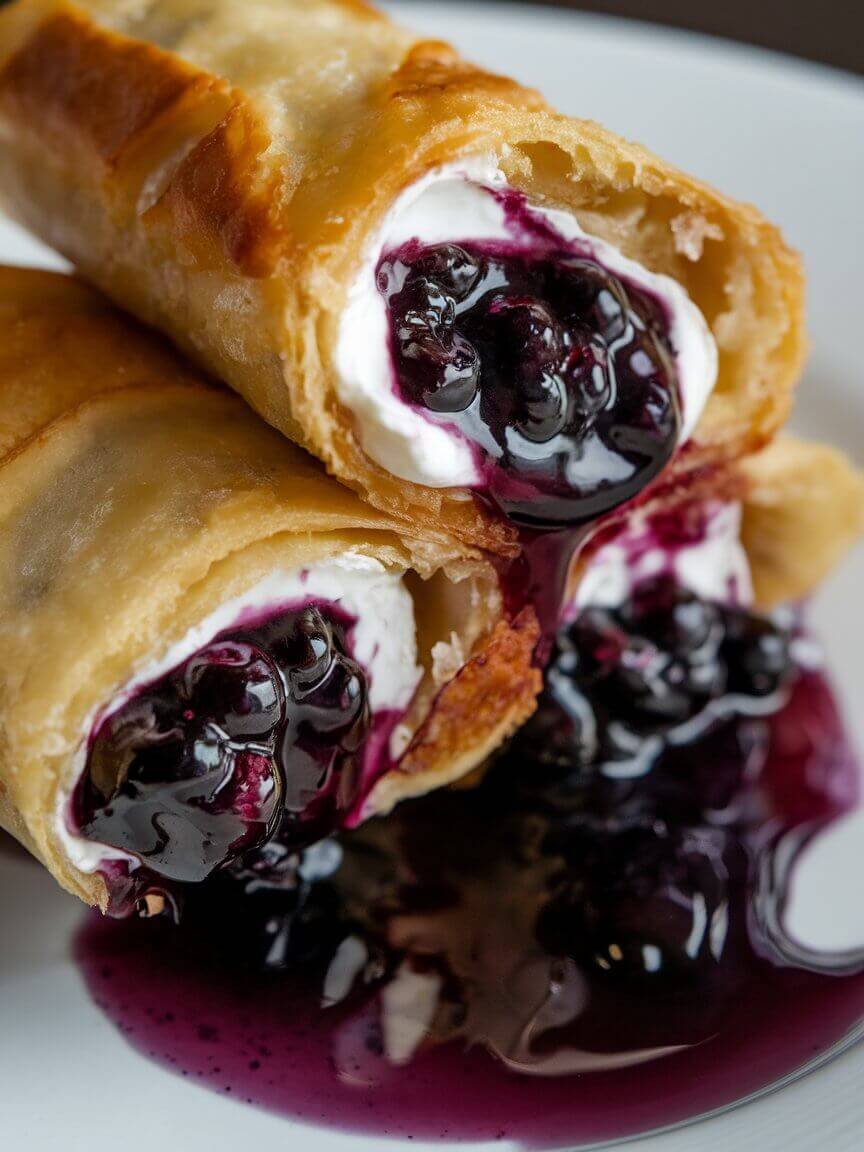
Crispy Blueberry Cream Cheese Egg Rolls

by donnyvicky February 15, 2025
written by donnyvicky

Looking for a delicious dessert that combines the crispy goodness of egg rolls with the sweet and tangy flavor of blueberries? These Blueberry Cream Cheese Egg Rolls are the perfect treat! They’re easy to make and ideal for impressing guests at your next gathering or satisfying your sweet tooth after a long day.

Imagine biting into a warm, crispy egg roll filled with a creamy blueberry mixture that melts in your mouth. Not only are these egg rolls a delightful dessert, but they also give you the satisfaction of knowing you made something extraordinary right in your own kitchen. Let’s dive into this delicious recipe that will leave everyone asking for more!

Delightful Blueberry Cream Cheese Egg Rolls Recipe

These crispy egg rolls are filled with a luscious cream cheese and blueberry filling, lightly fried to golden perfection. The contrast between the crunchy exterior and the creamy, sweet interior creates a taste sensation that’s simply irresistible.

Ingredients

  • 1 cup fresh or frozen blueberries
  • 4 oz cream cheese, softened
  • 2 tablespoons sugar
  • 1 teaspoon vanilla extract
  • 10 egg roll wrappers
  • Oil for frying
  • Powdered sugar for dusting (optional)

Instructions

  1. Prepare the Filling: In a bowl, mix the softened cream cheese, sugar, and vanilla extract until smooth. Gently fold in the blueberries.
  2. Fill the Egg Rolls: Lay an egg roll wrapper on a clean surface with one corner pointing towards you. Place 2 tablespoons of the blueberry cream cheese filling in the center. Fold up the bottom corner over the filling, then fold in the sides and roll tightly to seal. Repeat with remaining wrappers and filling.
  3. Fry the Egg Rolls: Heat oil in a deep skillet over medium heat. Once hot, carefully add a few egg rolls at a time, frying until golden brown on all sides, about 3-4 minutes. Remove and drain on paper towels.
  4. Serve: Dust with powdered sugar if desired and serve warm for the best flavor and texture.

Cook and Prep Times

  • Prep Time: 15 minutes
  • Cook Time: 10 minutes
  • Total Time: 25 minutes

Nutrition Information

  • Servings: 10 egg rolls
  • Calories: 150kcal
  • Fat: 8g
  • Protein: 2g
  • Carbohydrates: 18g
February 15, 2025 0 comments
0 FacebookTwitterPinterestEmail
Breakfast & BrunchDesserts & SweetsQuick & EasyRecipes

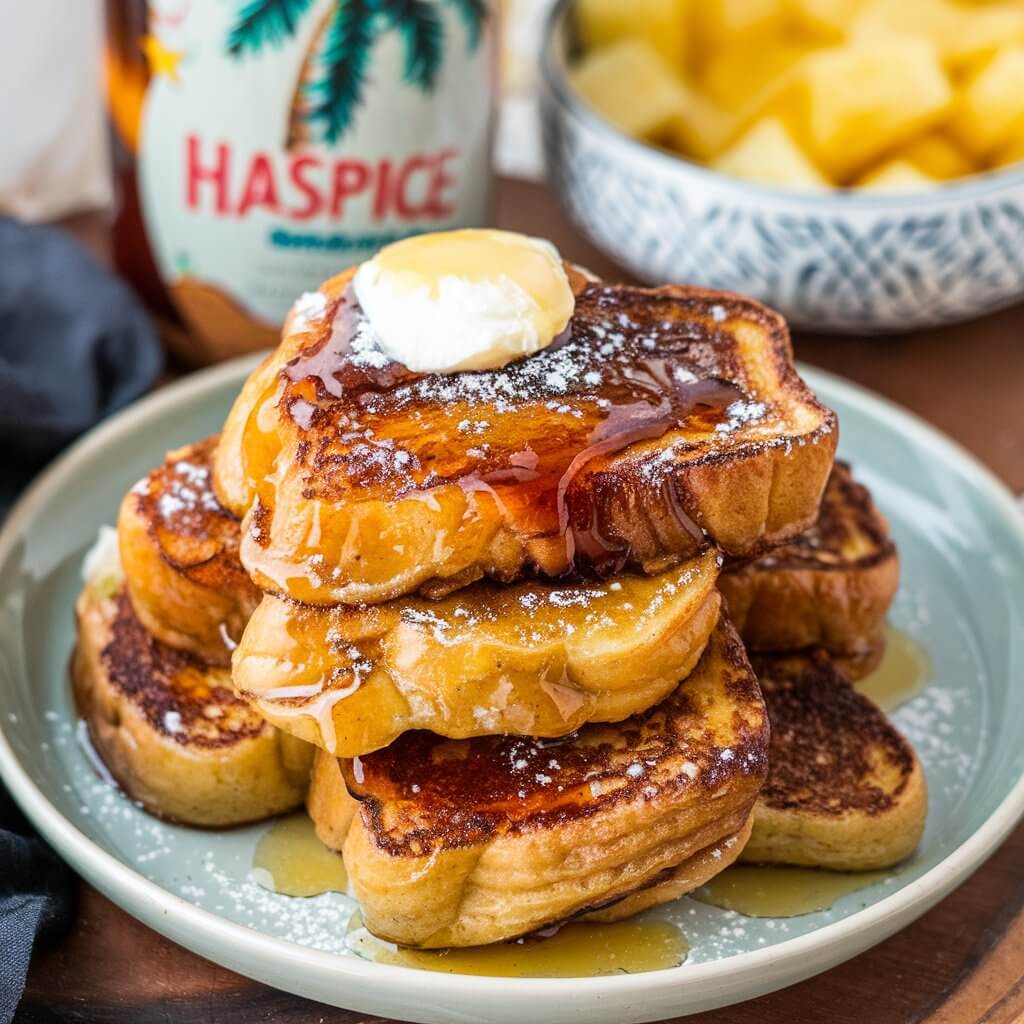
Sweet and Fluffy Hawaiian Roll French Toast

by donnyvicky February 15, 2025
written by donnyvicky

Looking for a delicious breakfast that will wow your family or guests? This Hawaiian Roll French Toast is your answer! Soft, sweet, and utterly satisfying, this dish elevates your typical morning routine into something special. The rich flavor of the Hawaiian rolls combined with a creamy egg mixture results in a breakfast treat that’s simply irresistible.

Imagine biting into a slice of this French toast, with its lightly crispy exterior and tender, fluffy inside, all infused with a hint of vanilla and cinnamon. Drizzle it with maple syrup, and you’ve got a breakfast that feels like a celebration.

Perfect for weekends or special occasions, this recipe comes together quickly, making it as practical as it is delicious. Get ready to make breakfast the highlight of your day!

Delicious Hawaiian Roll French Toast Recipe

This Hawaiian Roll French Toast features sweet and soft rolls dipped in a rich custard made with eggs, milk, vanilla, and cinnamon. It’s pan-fried to golden perfection, creating a delightful texture that is both crisp and fluffy.

Ingredients

  • 1 package of Hawaiian rolls (12 rolls)
  • 4 large eggs
  • 1 cup milk
  • 1 teaspoon vanilla extract
  • 1 teaspoon ground cinnamon
  • 1 tablespoon sugar
  • Butter for cooking
  • Maple syrup for serving
  • Powdered sugar for garnish (optional)

Instructions

  1. Prepare the Custard: In a large bowl, whisk together the eggs, milk, vanilla extract, ground cinnamon, and sugar until well combined.
  2. Slice the Rolls: Gently cut the Hawaiian rolls in half to create sandwich-like pieces.
  3. Dip the Rolls: Dip each half of the roll into the egg mixture, ensuring they’re well coated but not soaked.
  4. Cook: In a large skillet, melt a tablespoon of butter over medium heat. Place the dipped rolls cut-side down in the skillet. Cook until golden brown, about 3-4 minutes, then flip and cook the other side.
  5. Serve: Remove from the skillet and serve warm, drizzled with maple syrup and dusted with powdered sugar if desired.

Cook and Prep Times

  • Prep Time: 10 minutes
  • Cook Time: 15 minutes
  • Total Time: 25 minutes

Nutrition Information

  • Servings: 6 servings
  • Calories: 300kcal
  • Fat: 10g
  • Protein: 8g
  • Carbohydrates: 45g
February 15, 2025 0 comments
0 FacebookTwitterPinterestEmail
DrinksQuick & EasyRecipesSmoothies & Shakes

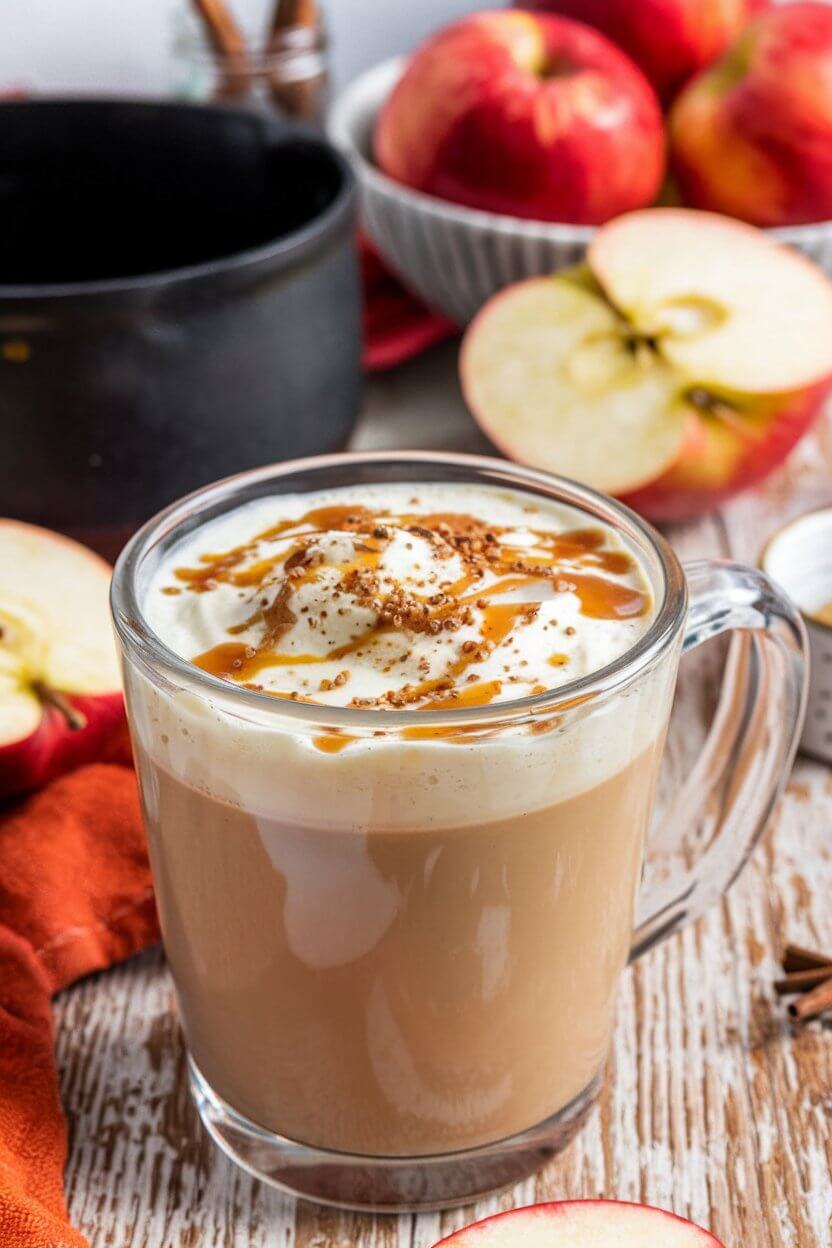
Delicious Apple Crisp Macchiato Recipe

by donnyvicky February 15, 2025
written by donnyvicky

If you’re on the hunt for a cozy fall beverage that perfectly combines the flavors of sweet apples and rich coffee, look no further than this Apple Crisp Macchiato. It’s an indulgent treat that captures the essence of autumn in every sip, making it the ideal drink for chilly mornings or lazy afternoons.

This delightful recipe is not just a pick-me-up; it’s a celebration of flavors. The smooth espresso meets the warm, spiced apple flavors, topped with a luscious layer of creamy milk. Drizzle some caramel on top, and you’ve got a drink that’s both comforting and decadent.

Perfect for impressing guests or simply treating yourself, this Apple Crisp Macchiato is a fun twist on a classic coffee favorite.

The Perfect Blend of Coffee and Fall Flavors

This Apple Crisp Macchiato features a harmonious blend of espresso, steamed milk, and spiced apple syrup, topped with a sprinkle of cinnamon. It’s sweet, creamy, and bursting with the warm flavors of fall, making it an exceptional choice for any coffee lover.

Ingredients

  • 1 shot of espresso
  • 1 cup steamed milk (dairy or non-dairy)
  • 2 tablespoons apple syrup (homemade or store-bought)
  • 1 tablespoon caramel sauce (for drizzling)
  • 1/4 teaspoon cinnamon
  • Optional: whipped cream for topping

Instructions

  1. Prepare the Espresso: Brew a shot of espresso using your preferred method.
  2. Heat the Milk: Steam the milk until it’s hot and frothy. If you don’t have a steamer, you can heat it on the stove or in the microwave and whisk to froth.
  3. Mix the Flavors: In a tall glass, combine the apple syrup and cinnamon. Pour the steamed milk over the syrup, stirring gently to blend the flavors.
  4. Add the Espresso: Slowly pour the espresso over the milk. This will create a lovely layered effect.
  5. Finish with Toppings: Drizzle caramel sauce over the top and, if desired, add whipped cream for extra indulgence.

Cook and Prep Times

  • Prep Time: 5 minutes
  • Cook Time: 5 minutes
  • Total Time: 10 minutes

Nutrition Information

  • Servings: 1 serving
  • Calories: 220kcal
  • Fat: 6g
  • Protein: 7g
  • Carbohydrates: 30g
February 15, 2025 0 comments
0 FacebookTwitterPinterestEmail
Breakfast & BrunchDrinksQuick & EasyRecipesSmoothies & Shakes

Tropical Pina Colada Smoothie Recipe

by donnyvicky February 15, 2025
written by donnyvicky

Are you in the mood for a refreshing escape? This Pina Colada smoothie is just the ticket. Bursting with tropical flavors, it’s like a mini-vacation in a glass that can lift your spirits any time of the year.

Imagine sipping on a creamy blend of ripe bananas, sweet pineapple, and rich coconut milk. This smoothie is not just a drink; it’s a delightful treat that brings the essence of a beach getaway right to your kitchen.

Deliciously Creamy Pina Colada Smoothie

This smoothie is a vibrant, fruity blend that’s both refreshing and indulgent. The tropical combination of pineapple and coconut creates a smooth and creamy texture, making it a perfect choice for breakfast or a midday snack.

Ingredients

  • 1 ripe banana
  • 1 cup fresh or frozen pineapple chunks
  • 1 cup coconut milk or yogurt
  • 1 tablespoon honey or agave syrup (optional)
  • 1/2 cup ice (if using fresh pineapple)
  • Chopped pineapple and shredded coconut for garnish (optional)

Instructions

  1. Blend the Ingredients: In a blender, combine the banana, pineapple chunks, coconut milk, and honey (if using). If you’re using fresh pineapple, add the ice as well.
  2. Blend Until Smooth: Blend on high speed until the mixture is completely smooth and creamy, scraping down the sides as needed.
  3. Serve: Pour the smoothie into glasses, and garnish with chopped pineapple and shredded coconut if desired. Enjoy immediately!

Cook and Prep Times

  • Prep Time: 5 minutes
  • Total Time: 5 minutes

Nutrition Information

  • Servings: 2 smoothies
  • Calories: 210kcal
  • Fat: 7g
  • Protein: 2g
  • Carbohydrates: 38g
February 15, 2025 0 comments
0 FacebookTwitterPinterestEmail
Breakfast & BrunchCoffee, Tea & Hot BeveragesDrinksQuick & EasyRecipes

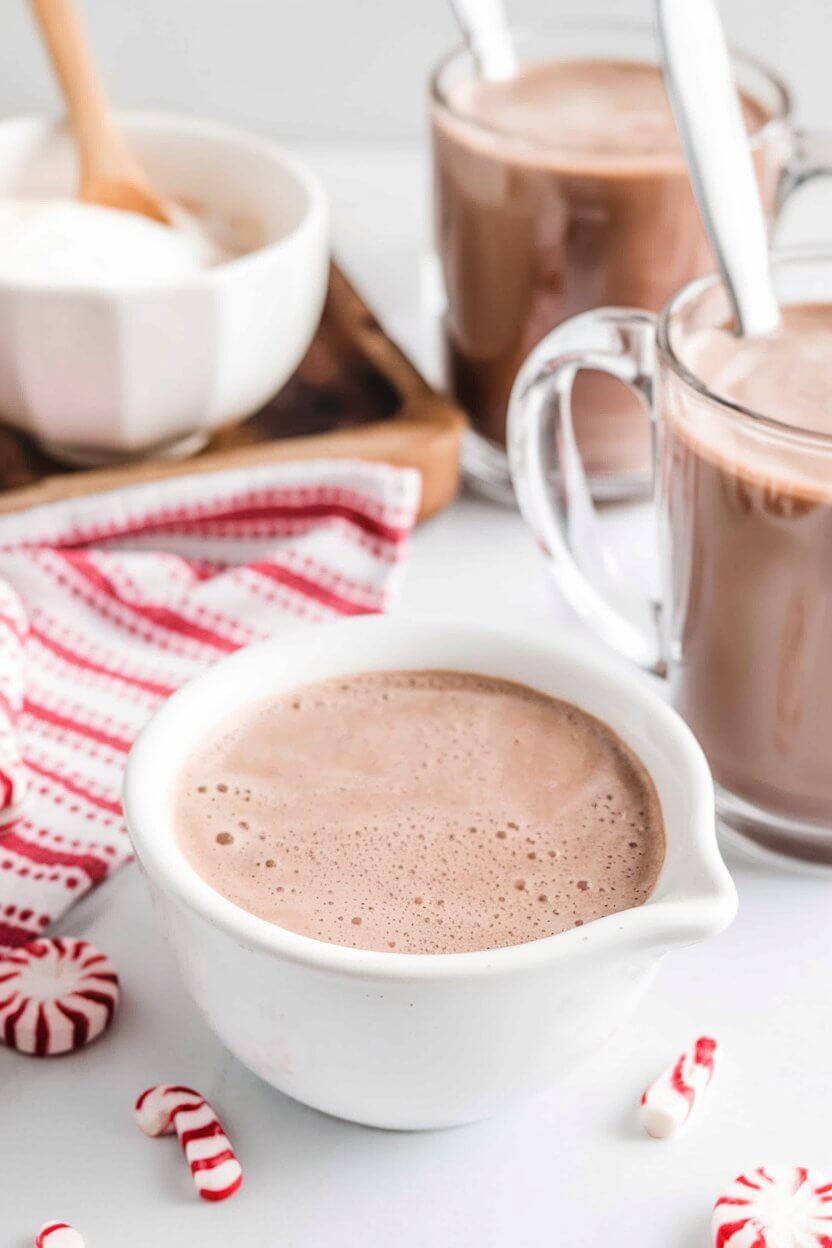
Creamy Homemade Peppermint Mocha Coffee Creamer

by donnyvicky February 15, 2025
written by donnyvicky

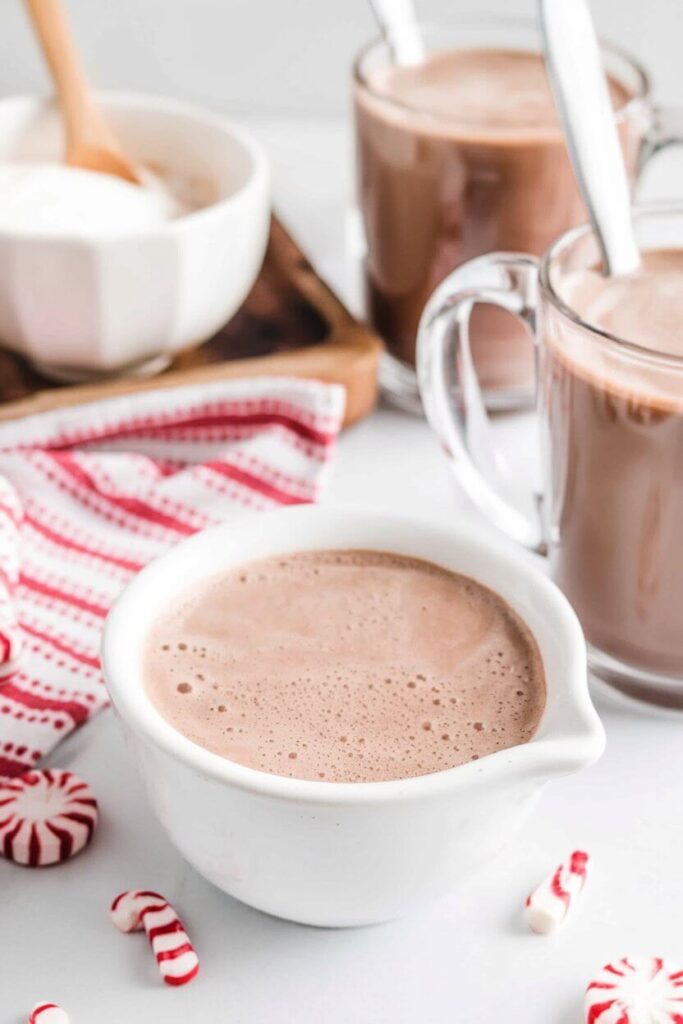
If you’re looking to elevate your coffee experience, this Homemade Peppermint Mocha Coffee Creamer is the perfect addition. It’s rich, creamy, and infused with the delightful flavors of chocolate and peppermint, making each sip feel like a holiday treat.

Imagine waking up to the comforting aroma of fresh coffee, complemented by the sweet notes of peppermint and mocha. This creamer not only enhances your morning brew but also provides a cozy, indulgent vibe that will keep you smiling all day long.

The Perfect Peppermint Mocha Coffee Creamer

This homemade coffee creamer is smooth and velvety, with a balanced taste that combines the richness of chocolate with the refreshing zing of peppermint. It’s a delightful way to add a festive flair to your daily caffeine fix.

Ingredients

  • 1 cup heavy cream
  • 1 cup milk (whole or your choice)
  • 1/2 cup sweetened condensed milk
  • 1/4 cup unsweetened cocoa powder
  • 1 teaspoon peppermint extract
  • 1/4 teaspoon vanilla extract
  • Optional: Whipped cream and chocolate shavings for topping

Instructions

  1. Combine Ingredients: In a saucepan over medium heat, whisk together the heavy cream, milk, and sweetened condensed milk until smooth.
  2. Add Flavor: Stir in the cocoa powder, peppermint extract, and vanilla extract. Continue to whisk until the mixture is well combined and heated through, but do not let it boil.
  3. Cool and Store: Remove the creamer from the heat and let it cool. Transfer it to a clean, airtight container and store it in the refrigerator.
  4. Serve: Use the creamer in your coffee as desired, and top with whipped cream and chocolate shavings if desired.

Cook and Prep Times

  • Prep Time: 5 minutes
  • Cook Time: 10 minutes
  • Total Time: 15 minutes

Nutrition Information

  • Servings: 12 servings
  • Calories: 80kcal per tablespoon
  • Fat: 5g
  • Protein: 1g
  • Carbohydrates: 9g
February 15, 2025 0 comments
0 FacebookTwitterPinterestEmail
Breakfast & BrunchQuick & EasyRecipes

Easy Overnight Refrigerator Focaccia Recipe

by donnyvicky February 15, 2025
written by donnyvicky

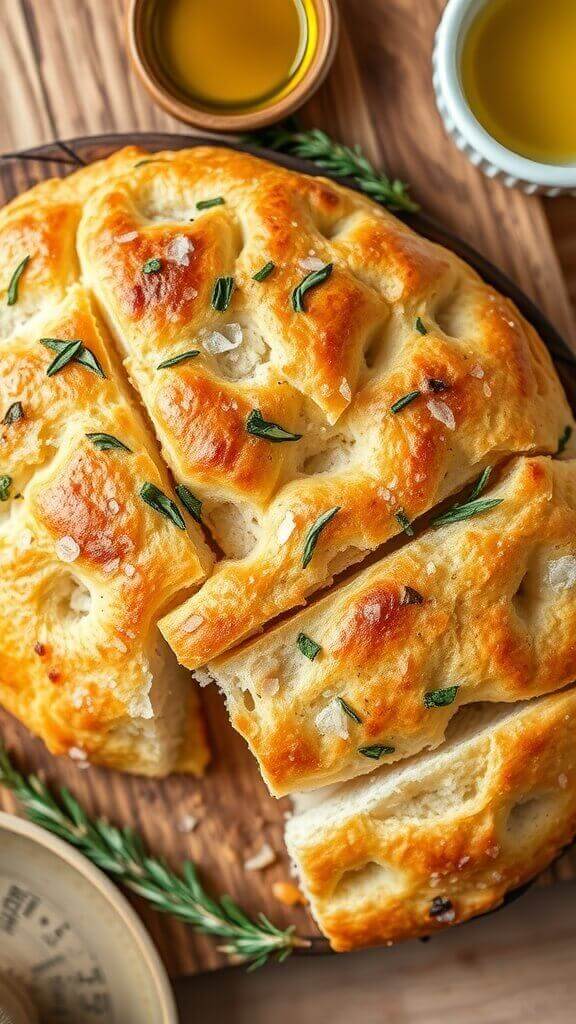
Have you ever wanted to impress your friends with homemade bread, but felt it was too complicated? This overnight refrigerator focaccia is the answer. It’s the perfect bread for any occasion, whether you’re hosting a dinner party or just treating yourself to something special. With minimal effort and a little patience, you’ll have a golden-brown, airy focaccia that is sure to be the star of the meal.

Picture this: waking up to freshly baked focaccia that requires only a few simple ingredients. You can customize it with your favorite toppings, from fresh herbs to olives or sun-dried tomatoes. This recipe allows the dough to develop flavor slowly in the fridge, giving it an incredible texture and taste.

If you love the idea of freshly baked bread without spending all day in the kitchen, this focaccia is for you. It’s easy to make, and you can prepare it ahead of time, making it a perfect option for busy days.

The Ultimate Overnight Focaccia

This focaccia boasts a crispy exterior with a soft, chewy interior. It’s infused with olive oil, salt, and whatever toppings you desire, creating a delicious balance of flavors. The overnight fermentation process results in a deep, rich taste that sets it apart from regular bread.

The aroma of freshly baked focaccia is irresistible, and the texture is both airy and satisfying. Serve it warm, and watch it disappear from the table!

Ingredients

  • 4 cups all-purpose flour
  • 2 teaspoons instant yeast
  • 2 teaspoons salt
  • 2 cups warm water
  • 1/4 cup olive oil, plus more for drizzling
  • Toppings (optional): sea salt, fresh herbs, cherry tomatoes, olives

Instructions

  1. Mix Dry Ingredients: In a large bowl, combine the flour, instant yeast, and salt.
  2. Add Water and Oil: Pour in the warm water and olive oil. Stir until a sticky dough forms.
  3. First Rise: Cover the bowl with plastic wrap or a damp cloth and let it rise at room temperature for about 30 minutes.
  4. Refrigerate: After the initial rise, transfer the bowl to the refrigerator and let the dough rest overnight (12-18 hours).
  5. Prepare for Baking: The next day, remove the dough from the refrigerator. Preheat your oven to 425°F (220°C). Grease a baking pan with olive oil.
  6. Shape and Top: Transfer the dough to the greased pan, gently stretching it to fit. Use your fingers to create dimples in the dough, drizzle with olive oil, and sprinkle with your choice of toppings.
  7. Second Rise: Cover the pan loosely with plastic wrap and let it rest for 30-60 minutes at room temperature.
  8. Bake: Bake for 25-30 minutes, or until golden brown. Let it cool slightly before cutting into squares and serving.

Cook and Prep Times

  • Prep Time: 10 minutes
  • Rest Time: 12-18 hours
  • Cook Time: 30 minutes
  • Total Time: 12-18 hours 40 minutes

Nutrition Information

  • Servings: 12 pieces
  • Calories: 150kcal
  • Fat: 5g
  • Protein: 4g
  • Carbohydrates: 24g
February 15, 2025 0 comments
0 FacebookTwitterPinterestEmail
DinnerQuick & EasyRecipesVeganVegetarians

Creamy Pasta Carbonara with Asparagus

by donnyvicky February 15, 2025
written by donnyvicky

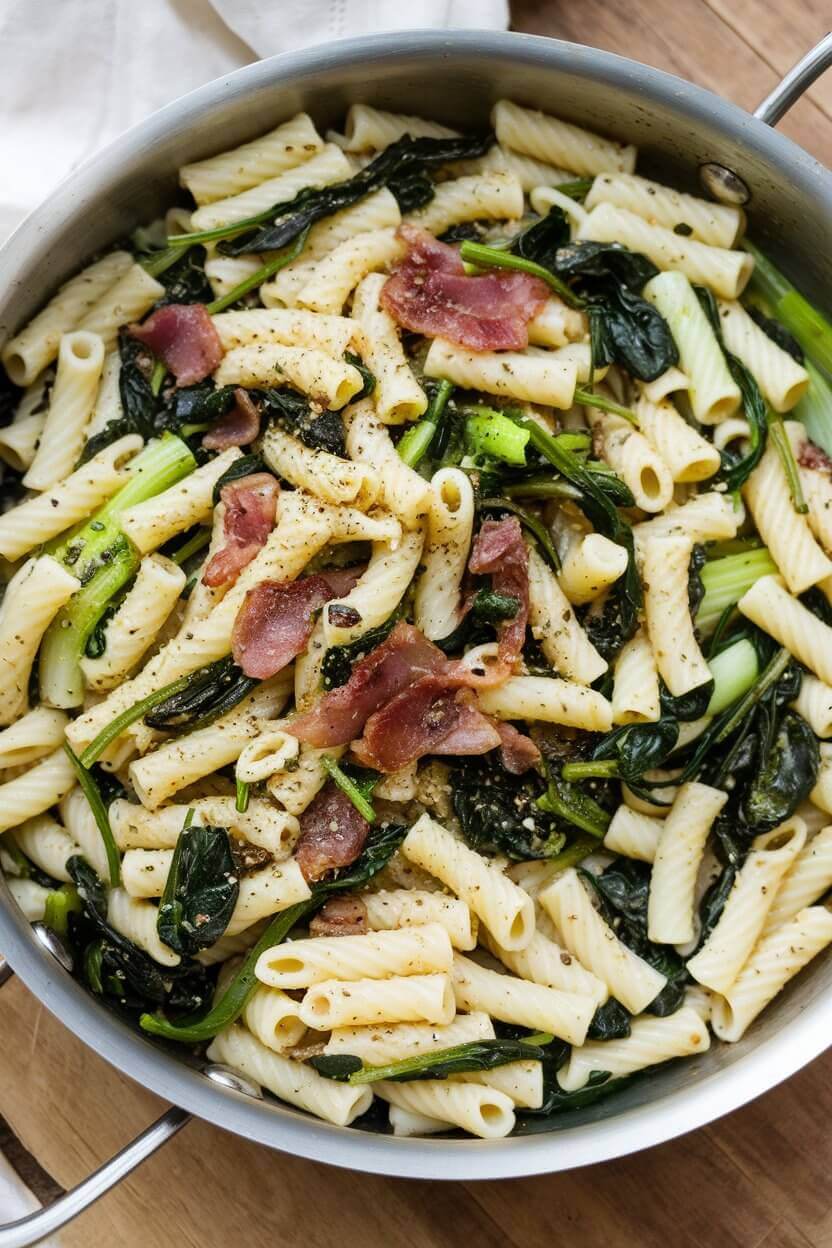
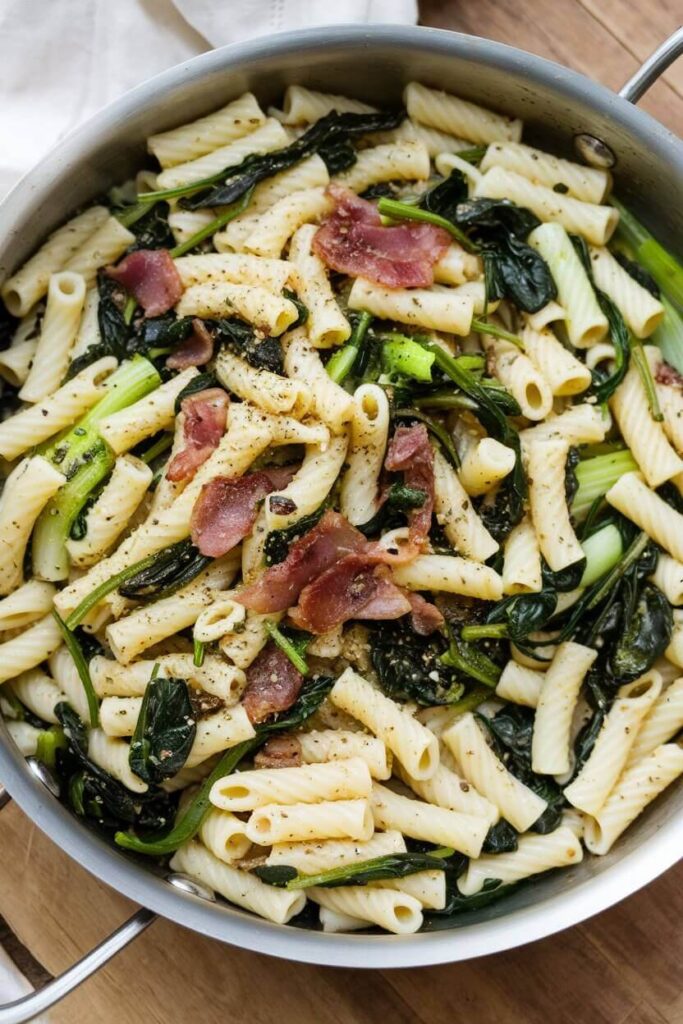
Craving a quick yet gourmet meal? This creamy pasta carbonara with asparagus is the answer! It’s a delightful twist on the traditional carbonara, bringing in tender asparagus for a splash of color and a hint of freshness. Whether you’re cooking for a special occasion or just want to impress yourself with a home-cooked dish, this recipe delivers.

Imagine twirling silky strands of pasta coated in a rich, creamy sauce, complemented by the crunch of sautéed asparagus and crispy pancetta. This dish is not just a meal; it’s an experience that tantalizes your taste buds and warms your soul.

Delicious Asparagus Pasta Carbonara

This pasta carbonara is a savory, satisfying dish featuring al dente spaghetti, creamy egg sauce, and crisp pancetta, beautifully enhanced by fresh asparagus. The combination of flavors makes it a delightful comfort food that’s ready in under 30 minutes.

Ingredients

  • 400g spaghetti
  • 150g asparagus, trimmed and cut into 2-inch pieces
  • 150g pancetta, diced
  • 3 large eggs
  • 100g grated Parmesan cheese
  • 2 cloves garlic, minced
  • Salt and black pepper to taste
  • Fresh parsley for garnish
  • 1 tablespoon olive oil

Instructions

  1. Cook the Pasta: In a large pot, bring salted water to a boil and cook the spaghetti according to package instructions until al dente. Reserve 1 cup of pasta water, then drain the pasta.
  2. Sauté the Asparagus: In a large skillet, heat olive oil over medium heat. Add the asparagus and cook for 3-4 minutes until tender-crisp. Add minced garlic and pancetta, cooking until the pancetta is crispy.
  3. Prepare the Sauce: In a bowl, whisk together the eggs and grated Parmesan cheese. Season with salt and black pepper.
  4. Combine: Add the cooked spaghetti to the skillet with asparagus and pancetta. Remove from heat and quickly pour in the egg mixture, tossing everything together. If the sauce is too thick, add reserved pasta water a little at a time until creamy.
  5. Serve: Plate the pasta carbonara, garnishing with chopped parsley and more Parmesan cheese if desired. Enjoy immediately!

Cook and Prep Times

  • Prep Time: 10 minutes
  • Cook Time: 15 minutes
  • Total Time: 25 minutes

Nutrition Information

  • Servings: 4
  • Calories: 450 kcal
  • Fat: 20g
  • Protein: 18g
  • Carbohydrates: 55g
February 15, 2025 0 comments
0 FacebookTwitterPinterestEmail
Newer Posts
Older Posts

Recent Posts

  • Delicious Peanut Butter and Jelly Oatmeal for Kids
  • Nutty Banana Protein Smoothie
  • Savory and Sweet Homemade McGriddle Recipe
  • Keto-Friendly Avocado and Smoked Salmon Breakfast Bowl
  • Deliciously Stuffed French Toast Recipe

Keep in touch

Facebook Twitter Instagram Pinterest Youtube

Popular Recipes

  • 1

    Sweet and Creamy Brown Sugar Vanilla Iced Coffee

    February 6, 2025
  • 2

    Refreshing Whipped Pink Lemonade Recipe

    February 18, 2025
  • 3

    Refreshing Strawberry Tequila Sunrise Recipe

    February 18, 2025
  • 4

    Refreshing Tropical Passion Fruit Smoothie Recipe

    February 18, 2025
  • 5

    Enchanting Sleeping Beauty Cocktail Recipe

    February 18, 2025
  • 6

    Nutty Banana Protein Smoothie

    February 22, 2025

Recent Posts

  • Delicious Peanut Butter and Jelly Oatmeal for Kids

    February 22, 2025
  • Nutty Banana Protein Smoothie

    February 22, 2025
  • Savory and Sweet Homemade McGriddle Recipe

    February 22, 2025

On Pinterest

Categories

  • Breakfast & Brunch (57)
  • Cocktails & Spirits (8)
  • Coffee, Tea & Hot Beverages (12)
  • Desserts & Sweets (61)
  • Dinner (147)
  • Drinks (47)
  • Meat Lovers (95)
  • Non-Alcoholic & Mocktails (17)
  • Quick & Easy (288)
  • Recipes (296)
  • Seafood (27)
  • Smoothies & Shakes (13)
  • Uncategorized (1)
  • Vegan (36)
  • Vegetarians (73)
  • About me
  • Contact Me
  • Privacy Policy
  • Disclaimer
  • Terms of Service
  • Facebook
  • Twitter

@2021 - All Right Reserved. Designed and Developed by PenciDesign


Back To Top
Healthful Plate
  • Home
  • Recipes
    • Vegan
    • Vegetarians
    • Meat Lovers
    • Seafood
    • Desserts & Sweets
    • Breakfast & Brunch
    • Dinner
    • Quick & Easy
  • Drinks
    • Cocktails & Spirits
    • Coffee, Tea & Hot Beverages
    • Non-Alcoholic & Mocktails
    • Smoothies & Shakes
  • Lifestyle
    • Editor’s Pick
    • Kitchen Gadgets